
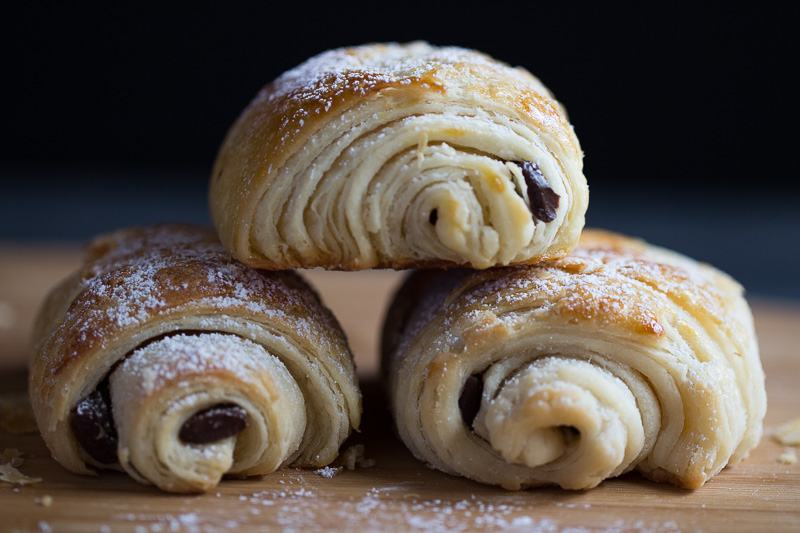

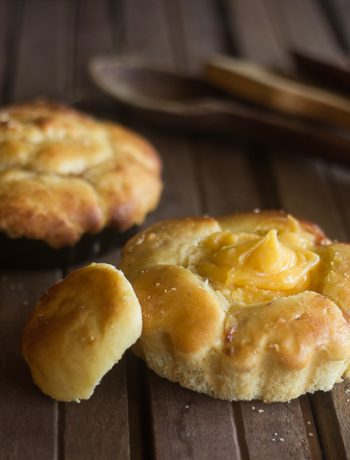
I recently attended a two-day workshop in making French pastries at the Adelaide Le Cordon Bleu school (they seem to have schools everywhere)! We learned how to make croissants, Pain au chocolat, brioche filled with cream, and pastries shaped like a slipper. Here is a photo of some of our ‘loot.’ Doesn’t that look good!
Photo courtesy of Emma Wormald, Le Cordon Bleu, Adelaide

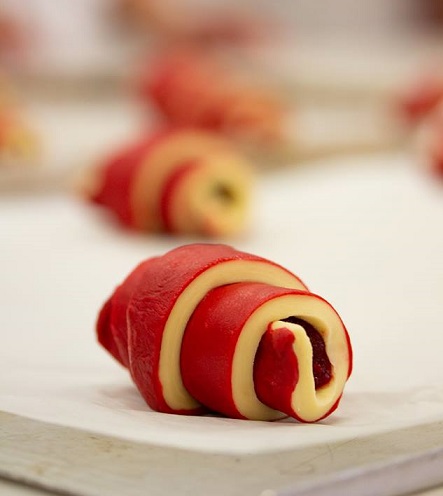
We even learned how to make a bi-colored croissant filled with jam:
Photo courtesy of Emma Wormald, Le Cordon Bleu, Adelaide
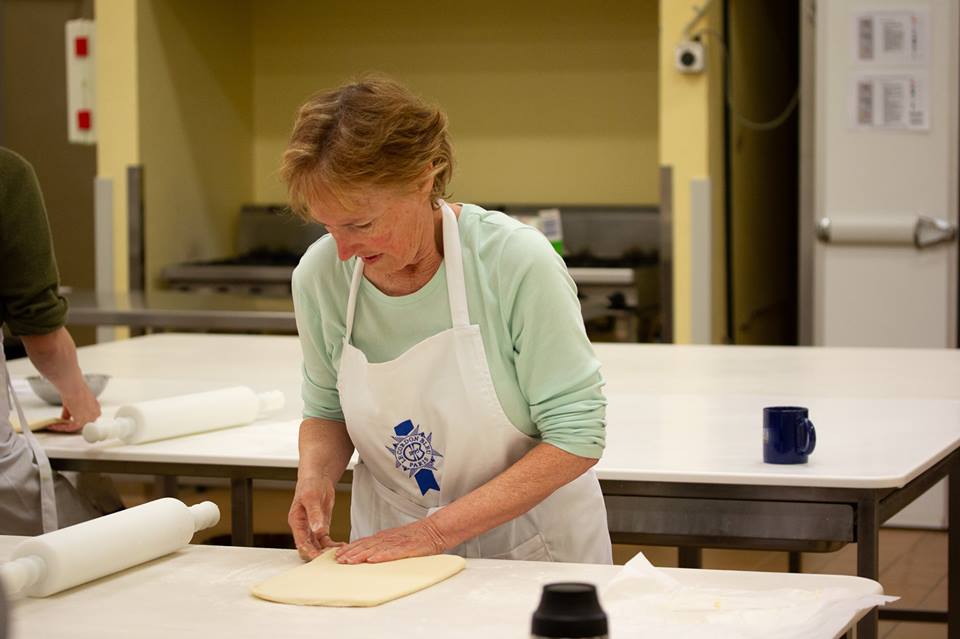
Here is a photo of me trying to master the art of making Pain au chocolat!
Photo courtesy of Emma Wormald, Le Cordon Bleu, Adelaide
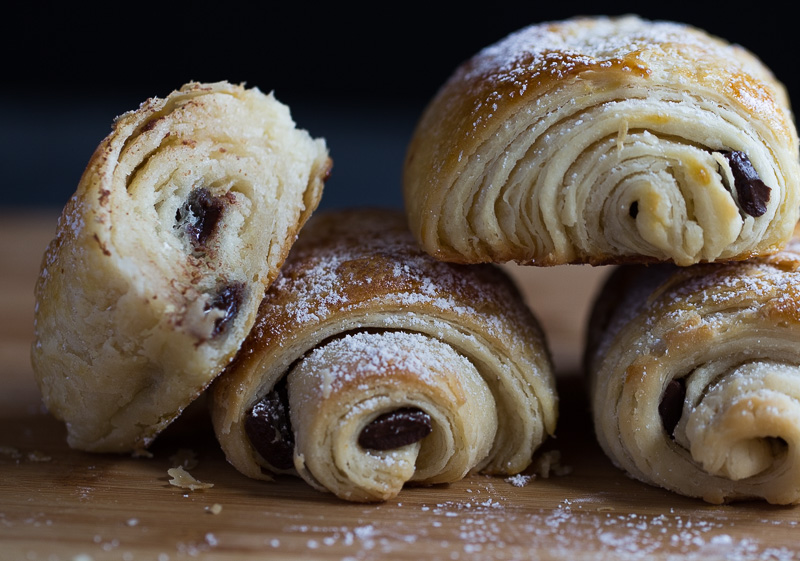
If you’ve ever eaten French pastries, you’ll be familiar with the flaky, buttery dough that seems to melt in your mouth and challenges your will power to its upper limits. The flaky layers of Pain au chocolat are achieved through the use of laminated dough– a technique creating many thin layers of dough separated by butter, produced by multiple steps of rolling and folding the dough.
My recipe below will create 25 layers of dough, separated by butter!
I’ve seen several ‘cheats’ recipes that promise to fast-track you to French pastry heaven, however the truth is, there is no short-cut to making flaky pastry- you really need to go through all the steps. I find that if I spread the process over two days, doing the mixing of ingredients on one day an the rolling and folding of the dough the next day, it is not that bad.
I was even inspired to buy a Kitchen Aid stand mixer to help knead the dough! This post is rather long and may appear a bit complicated. But you know what they say, “No pain, no gain!”
Here are a few tips:
- It’s important to keep the dough chilled while you are rolling it out and folding it. Otherwise, the butter will ‘melt’ into the dough and you’ll lose the layering effect.
- If you find the dough is becoming too warm, place it in the fridge for 20 minutes to chill, before continuing.
- The recipe calls for splitting the dough into two separate balls for easier handling. After you complete the process for rolling and folding one ball of dough, you’ll need to repeat the process for the second ball of dough.
- Use 3- inch long special chocolate sticks, made especially for Pain au chocolat pastries. I used Callibaut chocolate sticks, available on Amazon or specialty stores.
Here’s the method for making your Pain au chocolat (see printable recipe below):
The Method:
Add all the ingredients at once into the bowl of a stand mixer: flour, sugar, dried yeast, milk powder, butter, water and milk. Using a dough hook, mix for three minutes on speed #1, then 5-6 minutes on speed #2.
-
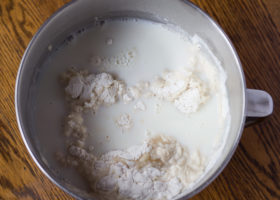
- Combine all ingredients at once into bowl
-
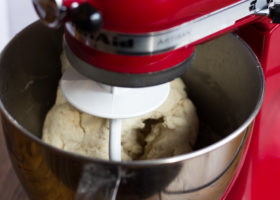
- Mix on speed #1 for 3 minutes, then speed #2 for 5-6 minutes
Divide the dough into two balls, cover loosely with plastic wrap and let rest for 45 minutes. After 45 minutes, press the balls into two rectangular shapes (about 8 x 6 inches) and place in the fridge overnight to rest.
On a lightly-floured surface, roll out one piece of dough into a rectangle measuring about 16 x 6 inches, with the shorter side facing you- the dough should be about 1/4 inch thick.
-
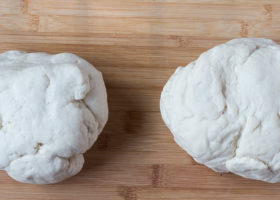
- Divide the dough into two balls, then let rest for 45 minutes.
-
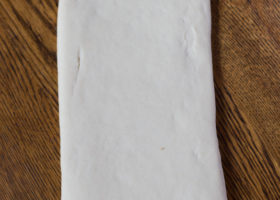
- Place dough in fridge overnight then roll into a rectangle about 16×6 inches.
Wrap two sticks of salted butter (one cup) in an ‘envelope’ of parchment paper- use a rolling pin to press down on the butter and shape it into a rectangle that will cover the lower half of your dough (i.e. measuring approximately 8 x 6 inches). Spread the butter over the lower half of your dough- the butter should be warm enough to be pliable, but not runny.
-
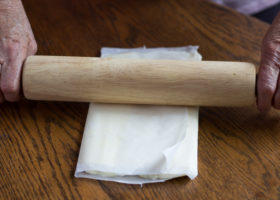
- Cover butter with parchment paper, shape into rectangle measuring 1/2 length of your dough
-
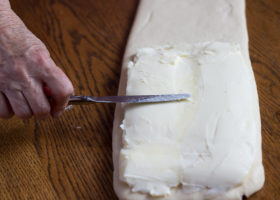
- Spread butter on lower half of dough
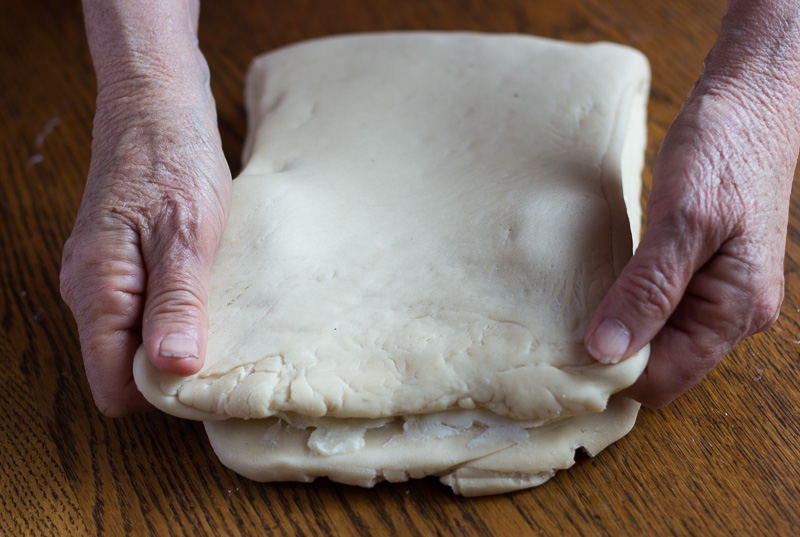
Fold the upper half of the dough over the lower half and then rotate the dough 1/4 turn so that the open seam that was on the bottom, is now located on the right side and the closed seam will be on your left (like a book). Make sure your edges are nice and even.
Fold the top of the dough over the bottom half. Follow with a 1/4 turn to left so that the closed seam remains on your left (like a book).
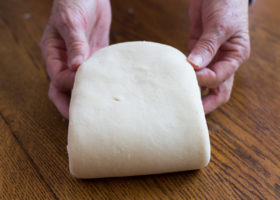
Now roll the dough out into a rectangle measuring approximately 12 x 6 inches, with the shorter side located closest to you. Fold both ends of the dough into the middle, bringing the top and bottom edges together.
-
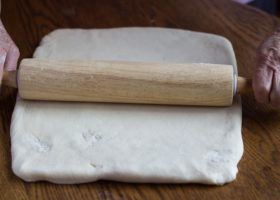
- Roll dough into 12 x 6 ” rectangle
-
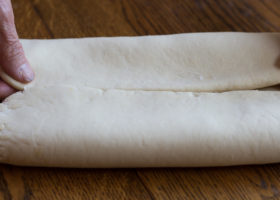
- Fold both ends of dough into the middle
Then fold the dough in half again (bringing the two halves together). This process is called a ‘four-fold.’
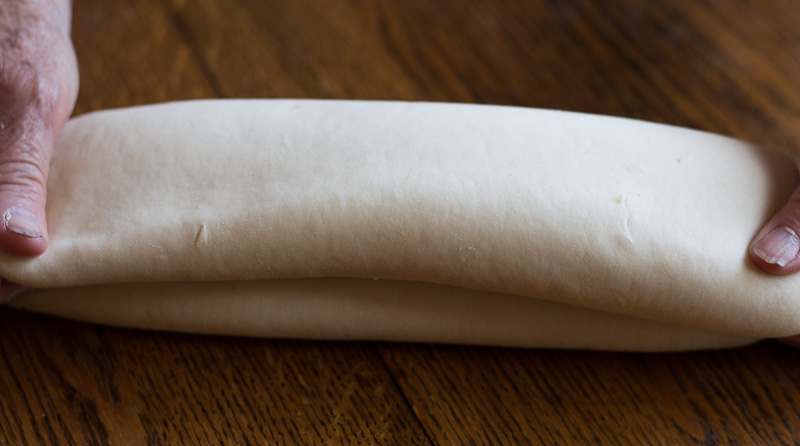
Cover the dough in plastic wrap and chill in the fridge for 20 minutes. Place the dough with the shorter end closest to you and roll-out the dough into another rectangle, measuring approximately 16 x 6 inches.
Fold the top part of the dough into the center, then fold the bottom part over to form a ‘business letter’ shape. This process is called a three-fold or simple fold. Place the dough in the fridge for 20 minutes to chill.
-
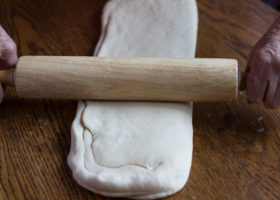
- Roll into rectangle 16 x 6 “
-

- Fold top part into center
-
- Fold bottom part over- like a ‘business letter’
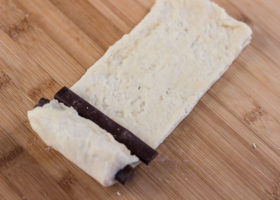
Place the dough on your workspace and turn the dough so that the closed seam is now on your left (like a book) and roll the dough out so that it is 1/8 inch thick. Here, you can cut the dough in half so that it is easier to work with- place the reserved dough in the fridge until you are ready to use it. Cut the dough into individual rectangles measuring 6 inches long and 3 inches wide.
Place one chocolate stick on the very bottom of the rectangle, roll the dough once or twice, then place another stick on the dough. Continue to roll the dough all the way up with the end of the rectangle facing on the bottom.
-
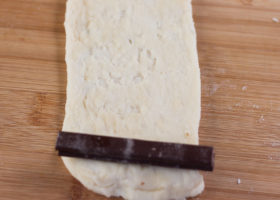
- Place chocolate stick on one end of rectangle
-
- Roll dough once or twice, then place 2nd chocolate stick on top of dough
-
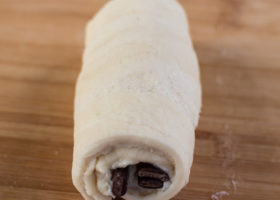
- Continue to roll dough with end facing bottom
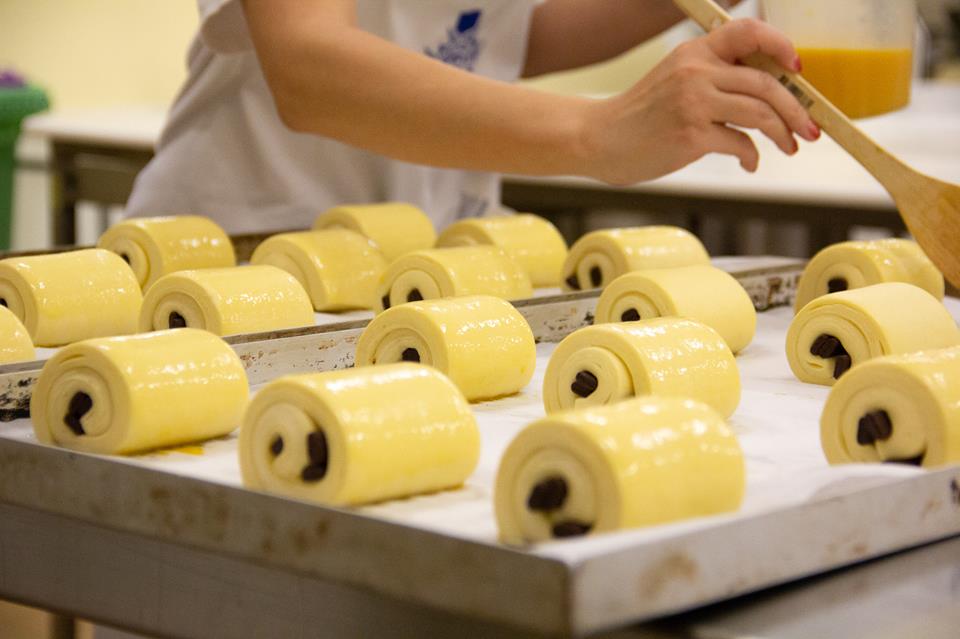
Place the pastries on a parchment paper-lined baking tray and set in a warm place until the dough has doubled in size (about 90 minutes). Brush with egg wash and bake at 375 F. for 12 minutes, turn the tray then bake for another approximately 5 minutes. The pastries should be golden on top and the dough cooked through. Dust with a little confectioner’s sugar and serve.
Brush with egg wash before baking
Place all the ingredients (except the laminated butter and egg wash) into the bowl of a stand mixer. Mix on #1 speed for 3 minutes, then speed #2 for 5-6 minutes. Remove the dough from the bowl, divide the dough into two balls, wrap loosely in plastic wrap and let rest for 45 minutes. Press each dough ball into a rectangular shape about 6 x 8 inches and place in the fridge overnight to rest. On a lightly-floured surface, roll out one ball into a rectangle measuring about 16 × 6 inches, with the shorter side facing you- the dough should be about 1/4 inch thick. In the meantime, wrap two sticks of salted butter (1 cup) in an ‘envelope’ of parchment paper- use a rolling pin to press down on the butter and shape it into a rectangle that will cover the lower half of one dough ball (i.e. measuring approximately 8 x 6 inches). Spread the butter over the lower half of your dough- the butter should be warm enough to be pliable, but not runny. Fold the upper half of the dough over the lower half and then rotate the dough 1/4 turn so that the open seam that was on the bottom, is now located on the right side and the closed seam will be on your left (like a book). Now roll the dough out into a rectangle measuring approximately 12 x 6 inches, with the shorter side located closest to you. Fold both ends of the dough into the middle (refer to photo). Then fold the dough in half again (bringing the two halves together). This process is called a ‘four-fold.’ Cover the dough in plastic wrap and chill in the fridge for 20 minutes. Remove from the fridge and place the dough with the shorter end closest to you and roll-out it out into another rectangle, measuring approximately 16 x 6 inches. Fold the top 1/3 of the dough into the center, then fold the bottom part over to form a ‘business letter’ shape. This process is called a three-fold technique. Place the dough in the fridge for 20 minutes to chill. Now place the dough on your workspace so that the closed seam is on your left (like a book) and roll the dough out so that it is 1/8 inch thick. Here, you can cut the dough in half so that it is easier to work with- keep ½ of the dough in the fridge while you are working with the other half. Cut the dough into individual rectangles measuring 6 inches long and 3 inches wide- make sure the dough is rolled out thinly to about 1/8 inch thick. Place one chocolate stick on the very bottom of each rectangle, roll the dough one or two revolutions, then place another stick on the dough. Continue to roll the dough all the way up with the end of the rectangle facing on the bottom. Place the pastries on a parchment paper-lined baking tray and set in a warm place until the dough has doubled in size (about 90 minutes). Brush with egg wash and bake at 375 F. for 12 minutes, turn the tray then bake for another approximately 5 minutes. The pastries should be golden on top and the dough cooked through. Dust with a little confectioner’s sugar and serve. Pain au Chocolat
Print Recipe
Ingredients
Instructions
19 Comments
mimi rippee
January 1, 2019 at 2:54 amThese are spectacular, Fran! Really and truly perfection! I love the photo that you also put on Instagram. I haven’t made croissant dough since I used to help my mother make it. I remember it’s hard work! Have a wonderful 2019!!!
John / Kitchen Riffs
January 1, 2019 at 3:24 amTerrific recipe! I’ve made puff pastry dough, and it’s WORK! I keep thinking about doing it for the blog, but I always lie down and rest until that feeling passes. 🙂 These look spectacular — thanks.
John / Kitchen Riffs recently posted…Holiday Sweets and Baking
David
January 1, 2019 at 3:41 amThese are gorgeous and your directions are clear and easy to follow. Maybe I will take vacation time this year just to make these! Brava! And Happy New Year!
Annis Young
January 1, 2019 at 5:38 amCan’t wait to try puff pastry! Discovered your site from Diane and Brian Wages — my SO Greg went to USAFA with Brian. Lovely site…I’m inspired! PS..nice photos!
Fran Flint
January 2, 2019 at 1:55 pmAnnis, thanks so much for stopping by and for subscribing to my blog. I so enjoyed meeting you last night!
Fran Flint recently posted…Pain au chocolat
Simply Sweet Justice
January 1, 2019 at 5:43 amPerfection! I did croissants at Le Cordon Bleu in Paris, and they are worth the effort and time!
Fran Flint
January 3, 2019 at 3:44 amOh, I’m so envious! I wish I could study the pastry course in Paris!
Fran Flint recently posted…Pain au chocolat
Karen (Back Road Journal@comcast.net
January 3, 2019 at 1:32 amMy hat is off to you, your pain au chocolat look like perfection. Wishing you all the best in this new year.
Karen (Back Road Journal@comcast.net recently posted…Happy New Year
Jeff the Chef
January 4, 2019 at 7:28 amThank you so much for these instructions. I was recently looking at a croissant recipe, thinking about how much I’d love to give it a try, and here you are, reinforcing that idea … with chocolate! I’ve always thought it’d be really difficult, but it looks like the difficulty mainly lies in stamina and dedication! Really, though, I can’t say enough how much I appreciate the pictures, because instructions like this can be so hard to decipher. I’m so eager to give this a try.
Fran Flint
January 5, 2019 at 6:49 amJeff, thanks for your comment. I hope you can give this recipe a try!
Fran Flint recently posted…Pain au chocolat
Juliana
January 5, 2019 at 4:52 amHappy New Year Fran! What an awesome recipe, I am loving it…especially the step-by-step pictures, I will have to try it…thank you so much for sharing it…
Have a great rest of the week!
Marcellina
January 8, 2019 at 4:28 pmThank you so much for the recipe and all the tips, Fran! I didn’t realise these is a Le Cordon Bleu school in Adelaide! This is something I’d love to do some day. Pinned for later.
Fran Flint
January 10, 2019 at 1:50 amMarcelina, thanks so much for your comment and for pinning it! Le Cordon Bleu also has a school in Sydney!
Kathy @ Beyond the Chicken Coop
January 10, 2019 at 12:01 amOh my goodness! What an amazing recipe. These are absolutely perfect looking. What an amazing opportunity to attend that cooking class. Nicely done!
Lynn @ Oh-So Yummy
January 12, 2019 at 3:35 amHi Fran! You’re always making wonderful food and sharing! I was about to ask if we could use the pasta attachment but then saw how thick the dough is. Hands on completely! Maybe hubby and I can make this recipe into a “date night” and we would be trying something new! <3
Fran Flint
January 12, 2019 at 8:59 amYes, ‘date night’ would be great for this recipe, but you’ll need to start the dough process the night before to let the dough rest. After that, it’s just a matter o folding and rolling out the dough several times!
lisaiscooking
January 15, 2019 at 7:42 amBeautiful pastries, and great job making them! I’m getting pastry cravings looking at these photos. The swirls of dough and chocolate look delicious.
Tanza Erlambang
January 17, 2019 at 7:32 amThank you for sharing your recipe.
have a great day
Tanza Erlambang recently posted…Is Your Country Safe to Live?
Muriel Gibson
May 27, 2026 at 8:13 pmI wish to subscribe