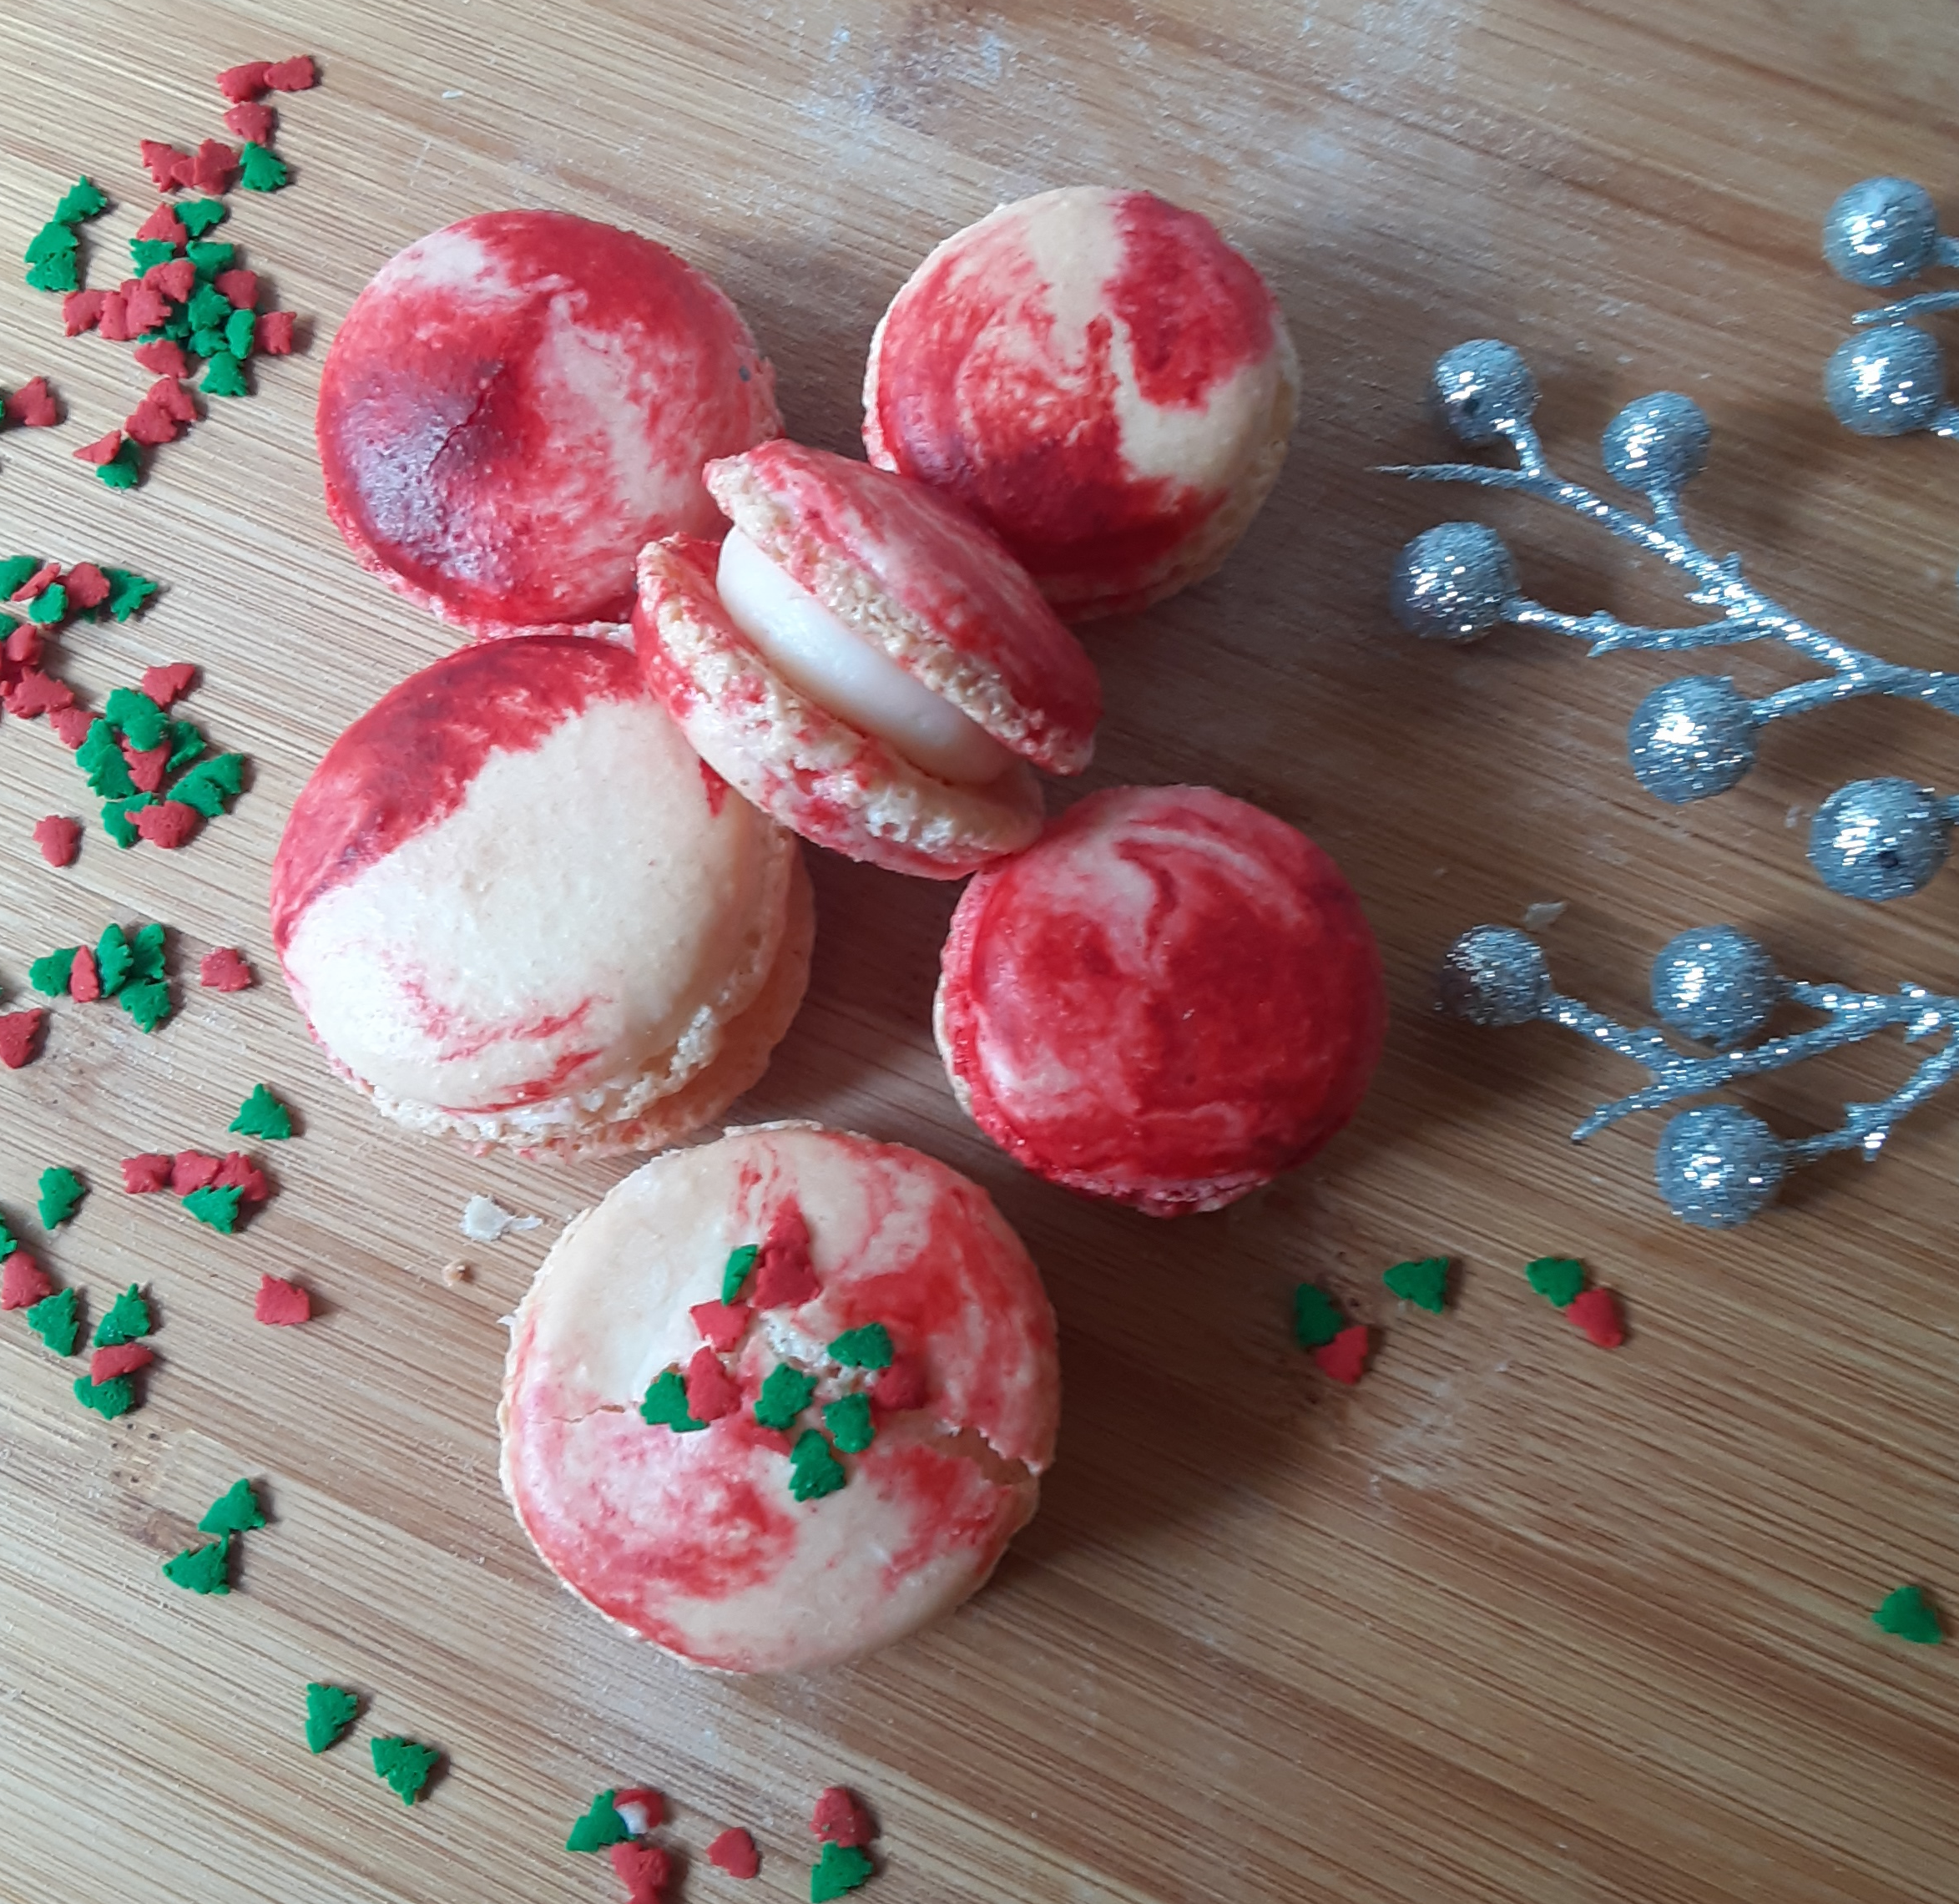

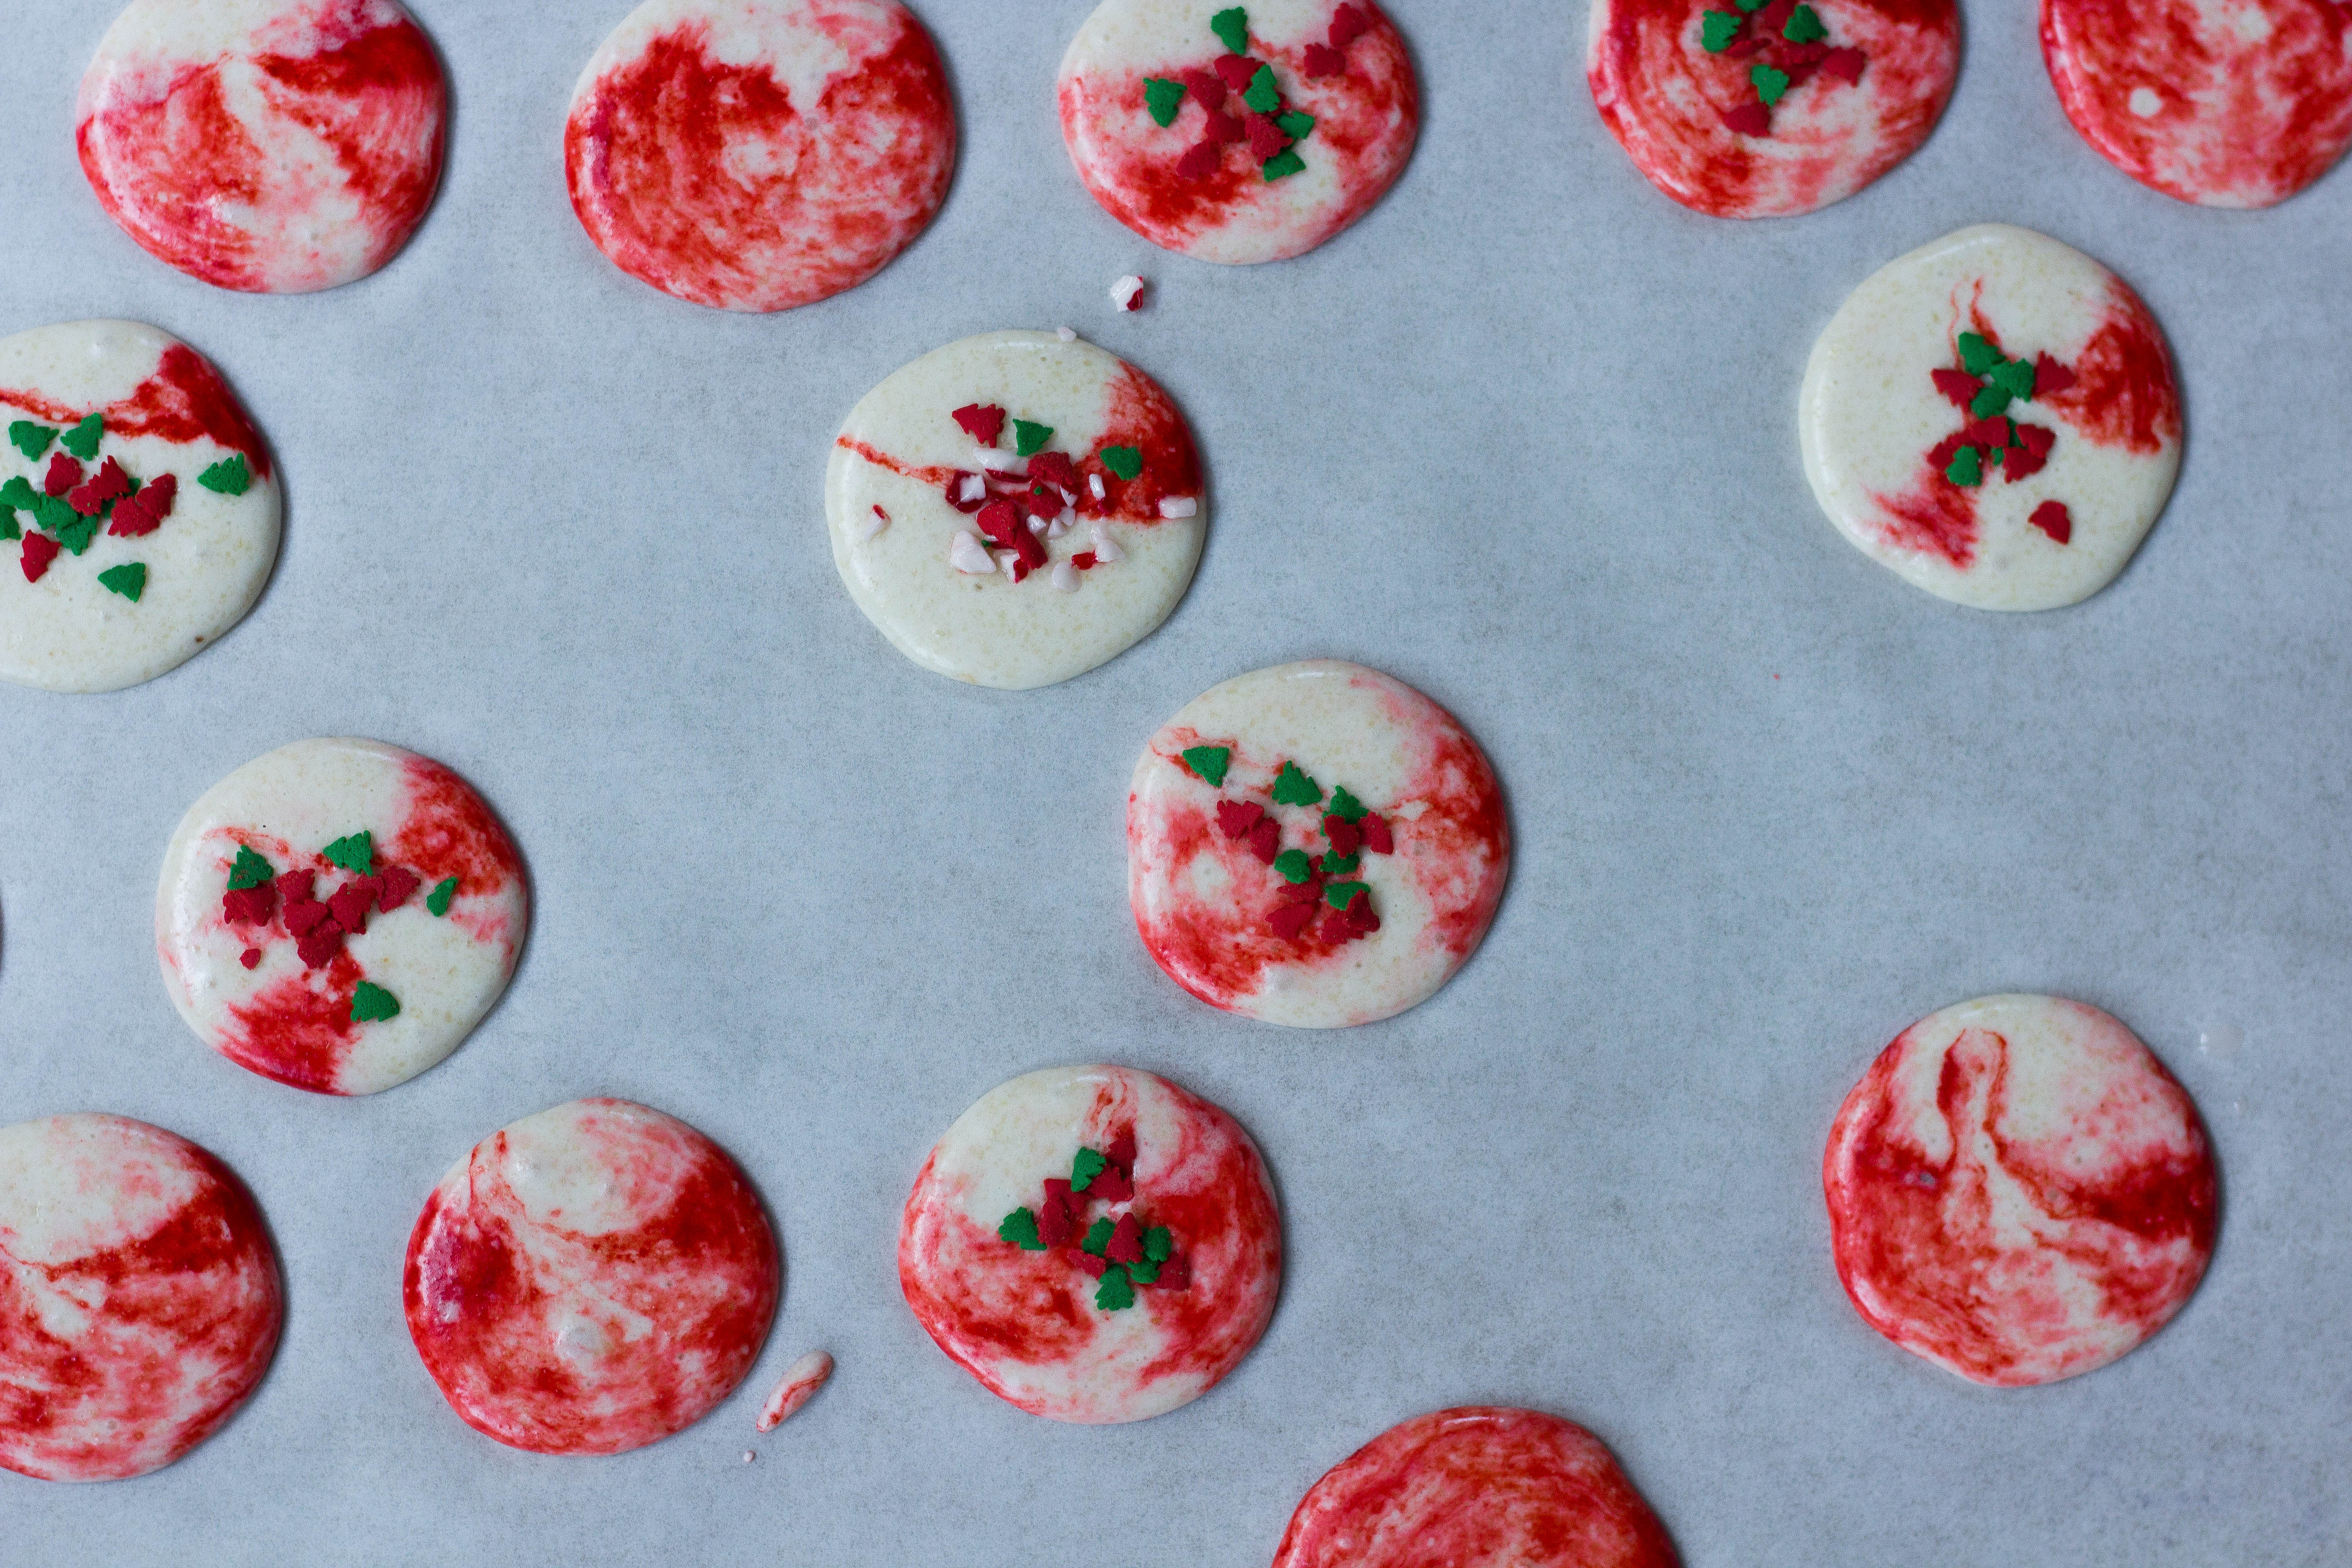
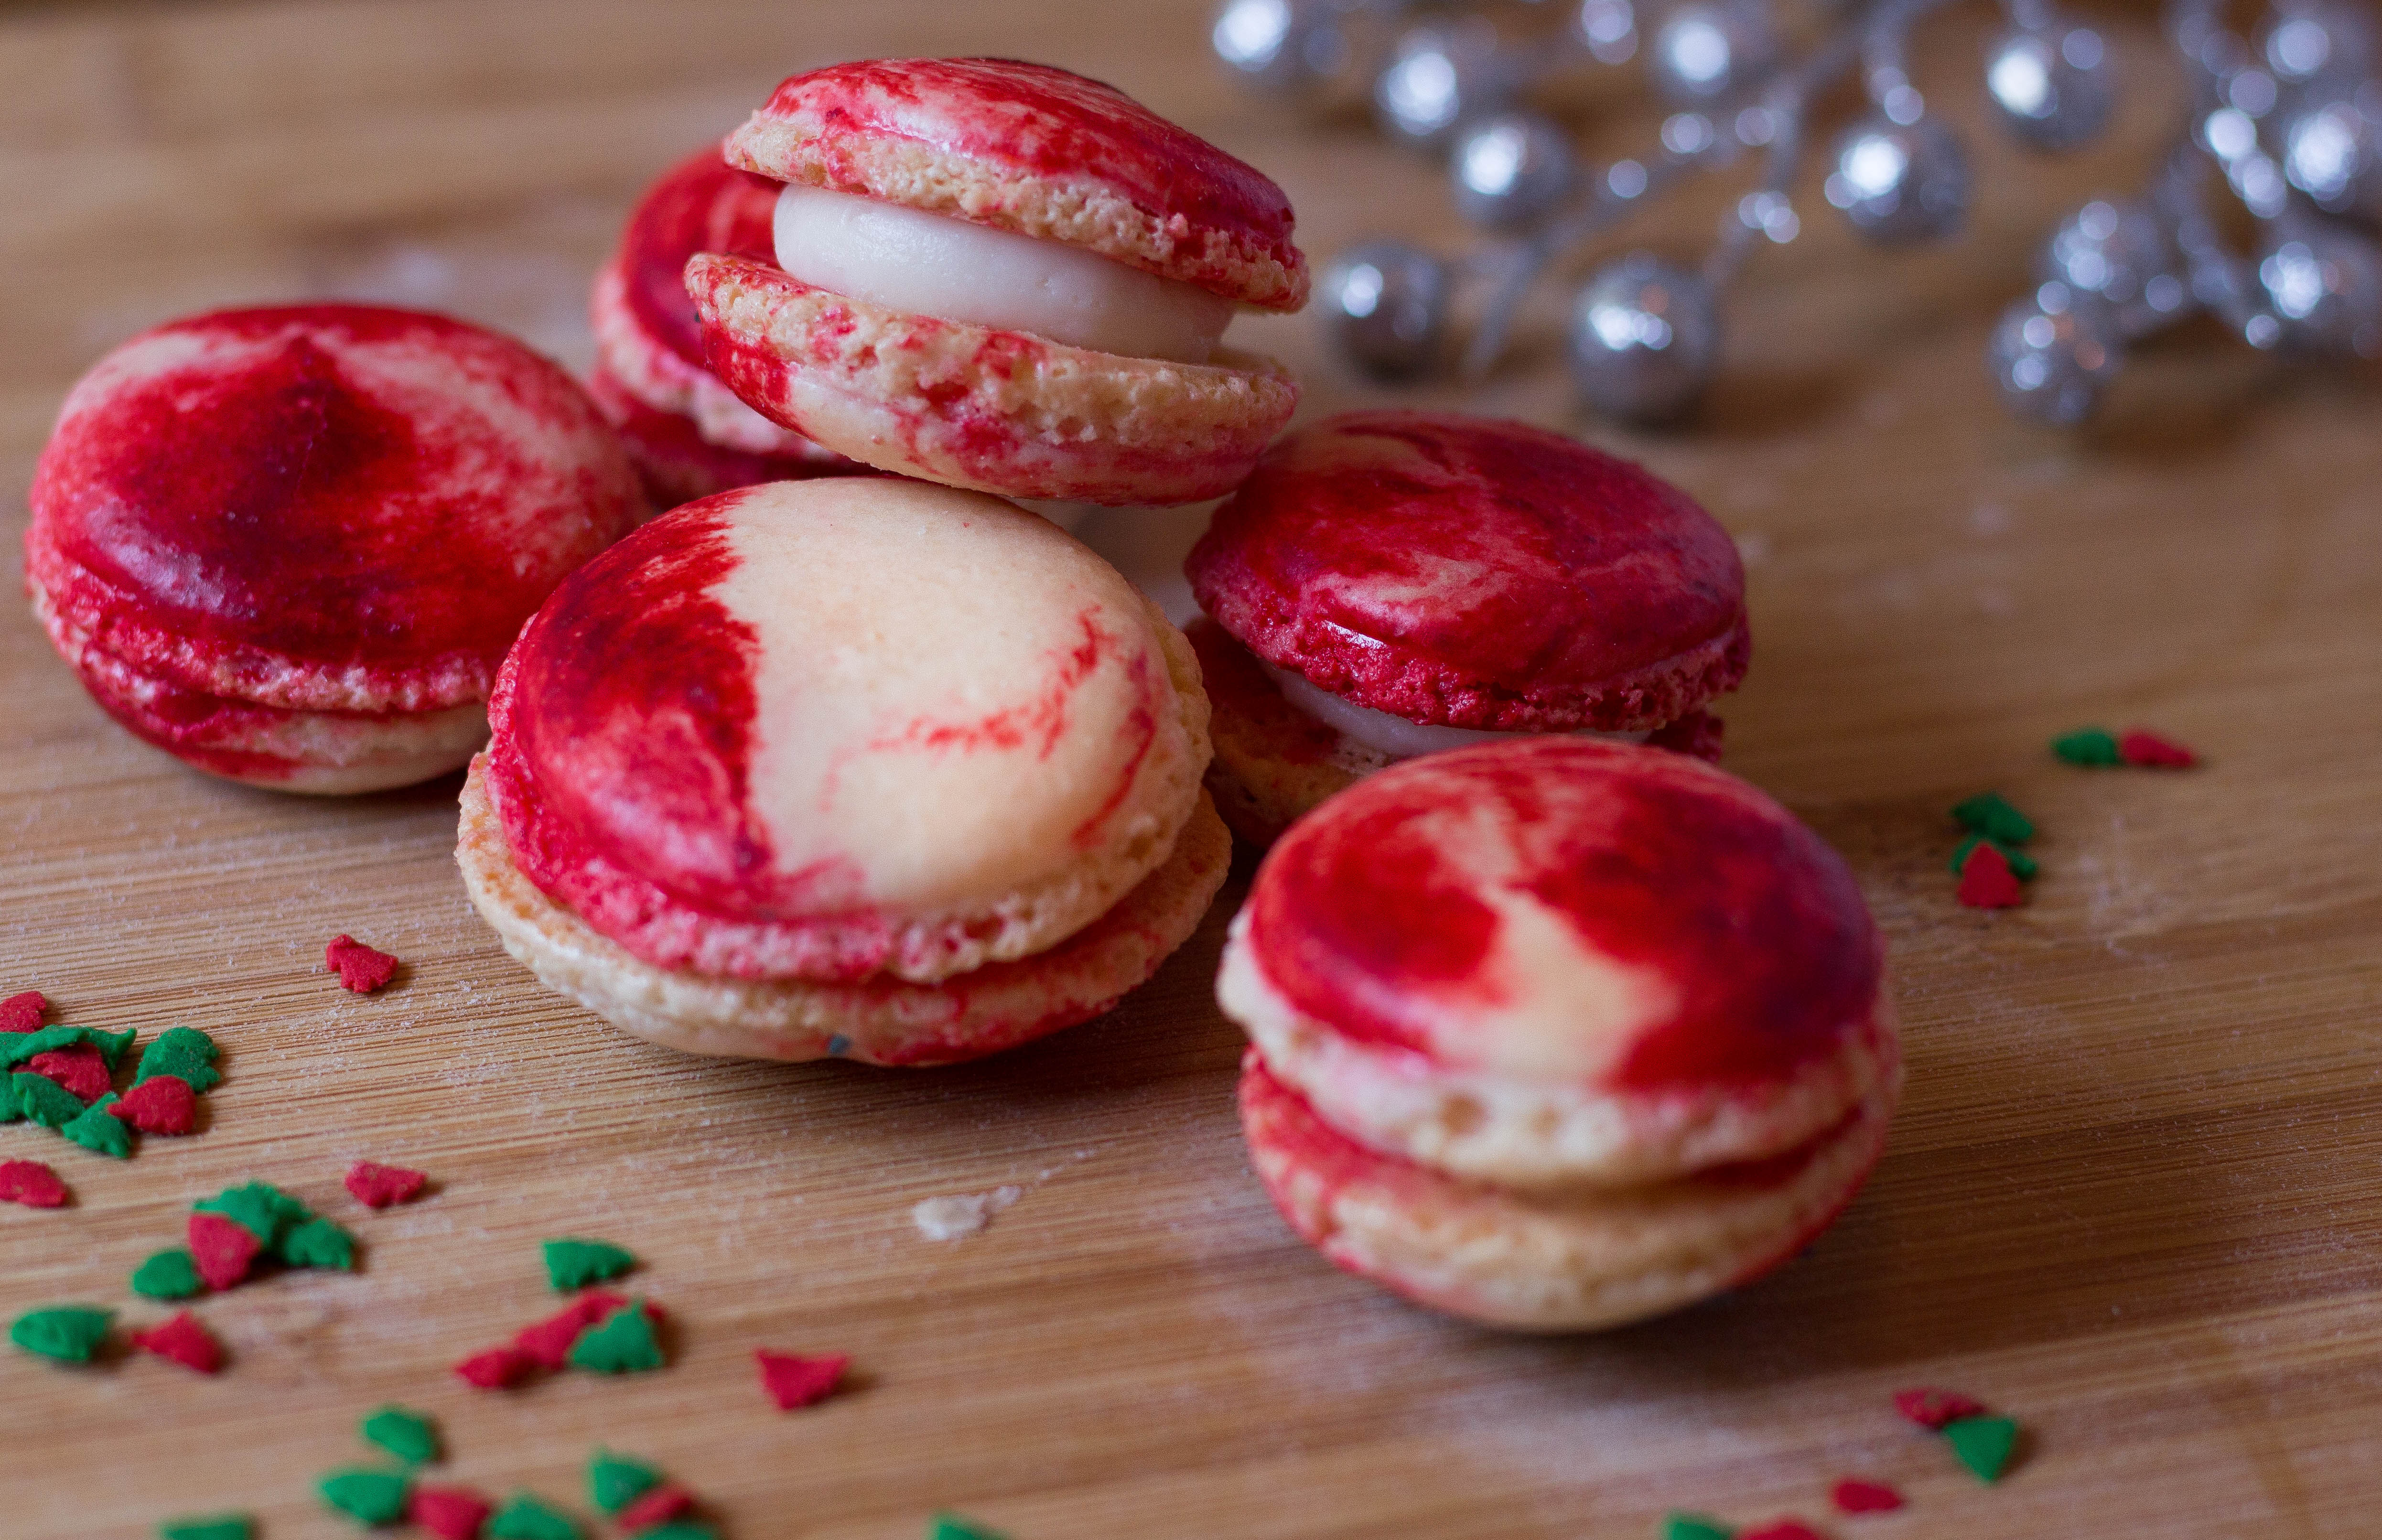
Here’s a recipe that will dress up your Macarons for the holidays- Peppermint Macarons! I’ve always wondered how to get that ‘swirly tie-dyed’ effect on Macarons and discovered that it’s quite easy. All you do is paint two thin lines of dye inside your piping bag before adding the batter. When you squeeze the piping bag, the batter comes out in colorful swirly lines.
You can also add a few sprinkles on top for decoration. I added some miniature edible Christmas trees, but don’t add too many or your macarons tops may crack!
The Peppermint Buttercream filling gives a nice refreshing flavor to the Macarons. So easy to make with softened butter, confectioner’s sugar and a little milk.
I previously posted a recipe for Chocolate Buttercream Macarons with step-by-step instructions. I’ve re-printed the detailed instructions for making macarons. However, if you are already familiar with the basic steps, please skip toward the end which explains how to make the ‘swirly’ lines. I have also provided the full printed recipe as well.
The Process
Place the almond flour and confectioner’s sugar in a food processor and process for about 30-40 seconds. Pass the mixture through a sieve and transfer to a mixing bowl and set aside. The mixture should resemble talcum powder.
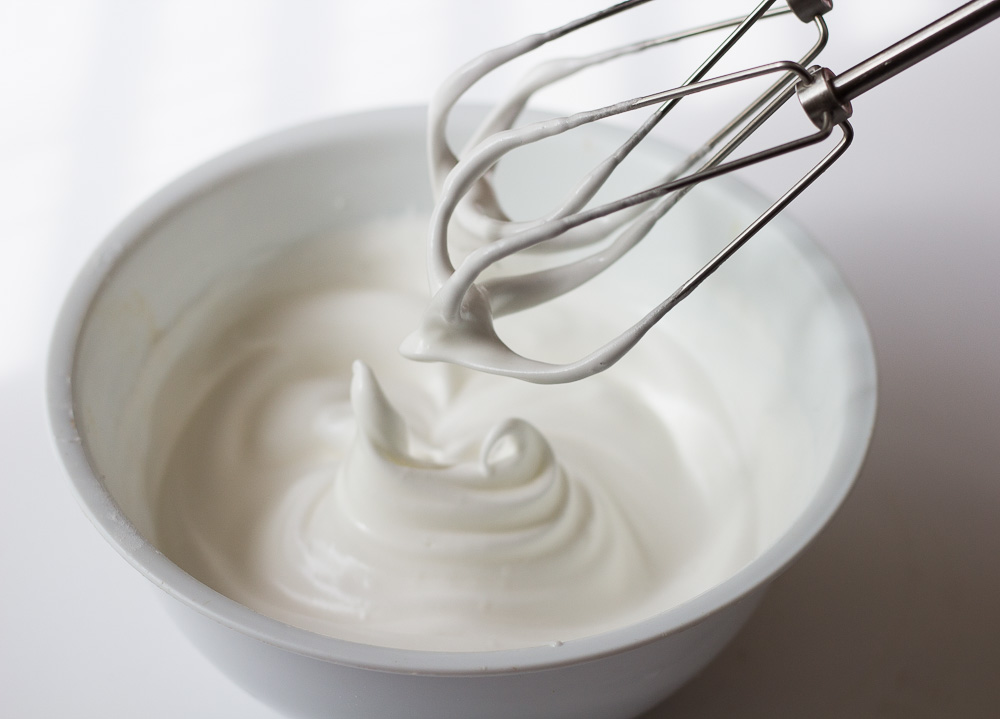
Place the egg whites and cream of tarter in a large bowl and beat with electric beaters on high until soft peaks form, (about two minutes), then add the granulated sugar and continue to beat until stiff peaks form and the mixture turns shiny. (You should be able to hold the bowl upside down and the egg whites will still cling to the bowl).
The Macronage
Using a rubber spatula, add the dry mixture into the egg whites in three separate additions, gently folding thoroughly after each addition. For the folding technique, scrape the spatula along the side of the bowl using an outward motion, then fold the spatula over. Be sure to cut into the middle of the mixture occasionally with the spatula. Continue until the ingredients are fully combined- the mixture should still be fluffy and a bit grainy.
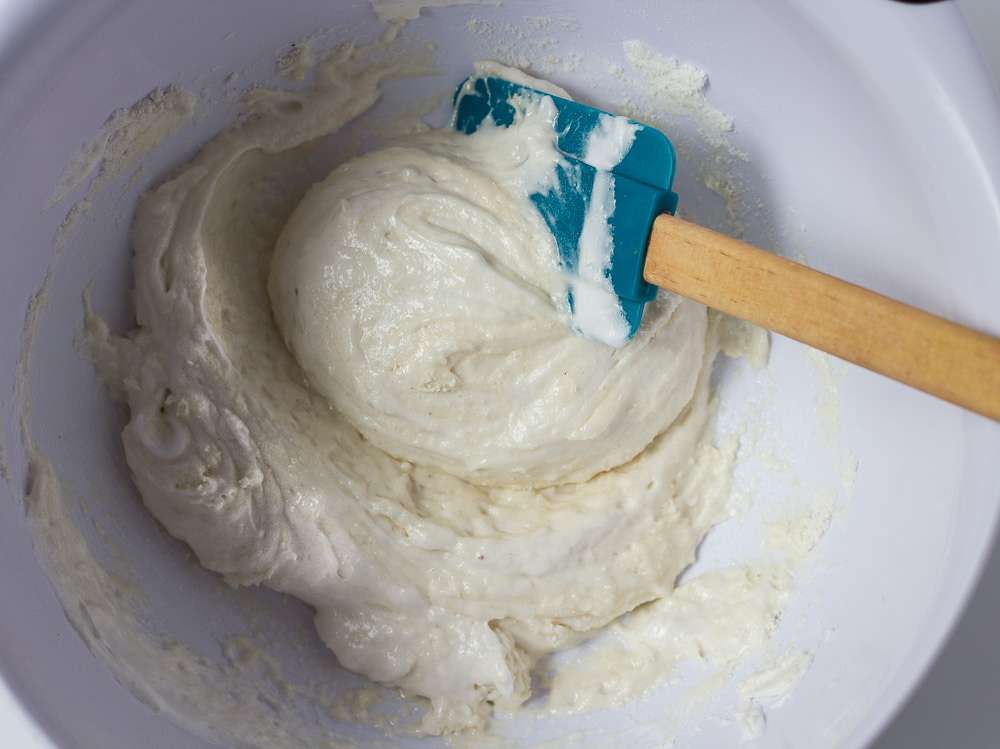
Macronage Second Step
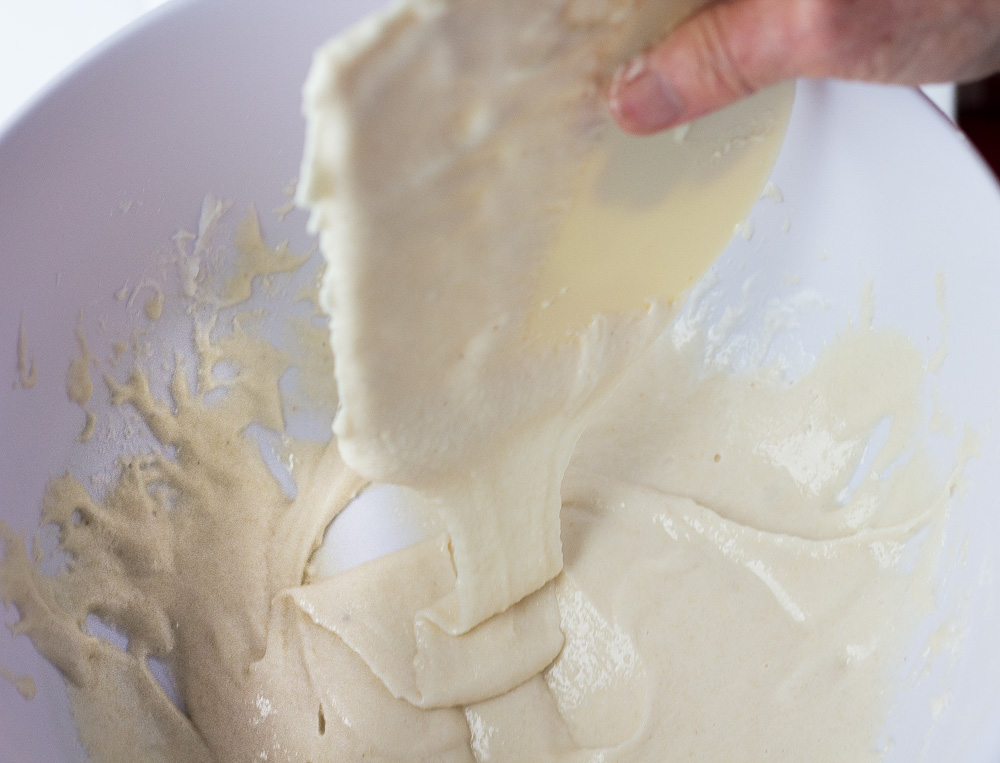
Using a dough scraper, continue mixing the macaron batter, pressing the flat edge of the scraper against the sides of the mixing bowl to release any air bubbles and to further incorporate the egg whites into the batter. Continue mixing until ‘ribbons’ begin to fall off the edge of the scraper (you should be able to draw a figure 8 in the batter). The batter should appear smooth and satiny. Caution: do not over-mix the batter; you should only need between 7-8 motions for this step.
Batter should fall off the scraper in ribbons
Draw two thin lines inside piping bag
Place the piping bag (12 ” or 18 ” bag) into a container and fold the upper edges over the top, fitting like a ‘collar.’ Place a few drops of red food dye (or other color) into a bowl and dip a small brush into the dye. Starting from the bottom of the pastry bag, draw a thin line going from the nozzle to the top. The line should be thin and should not be solid. Draw a second thin line opposite the first, then fill the bag with the macaron batter. You should now see the streaks of dye inside the piping bag.

Draw two thin lines of dye inside piping bag 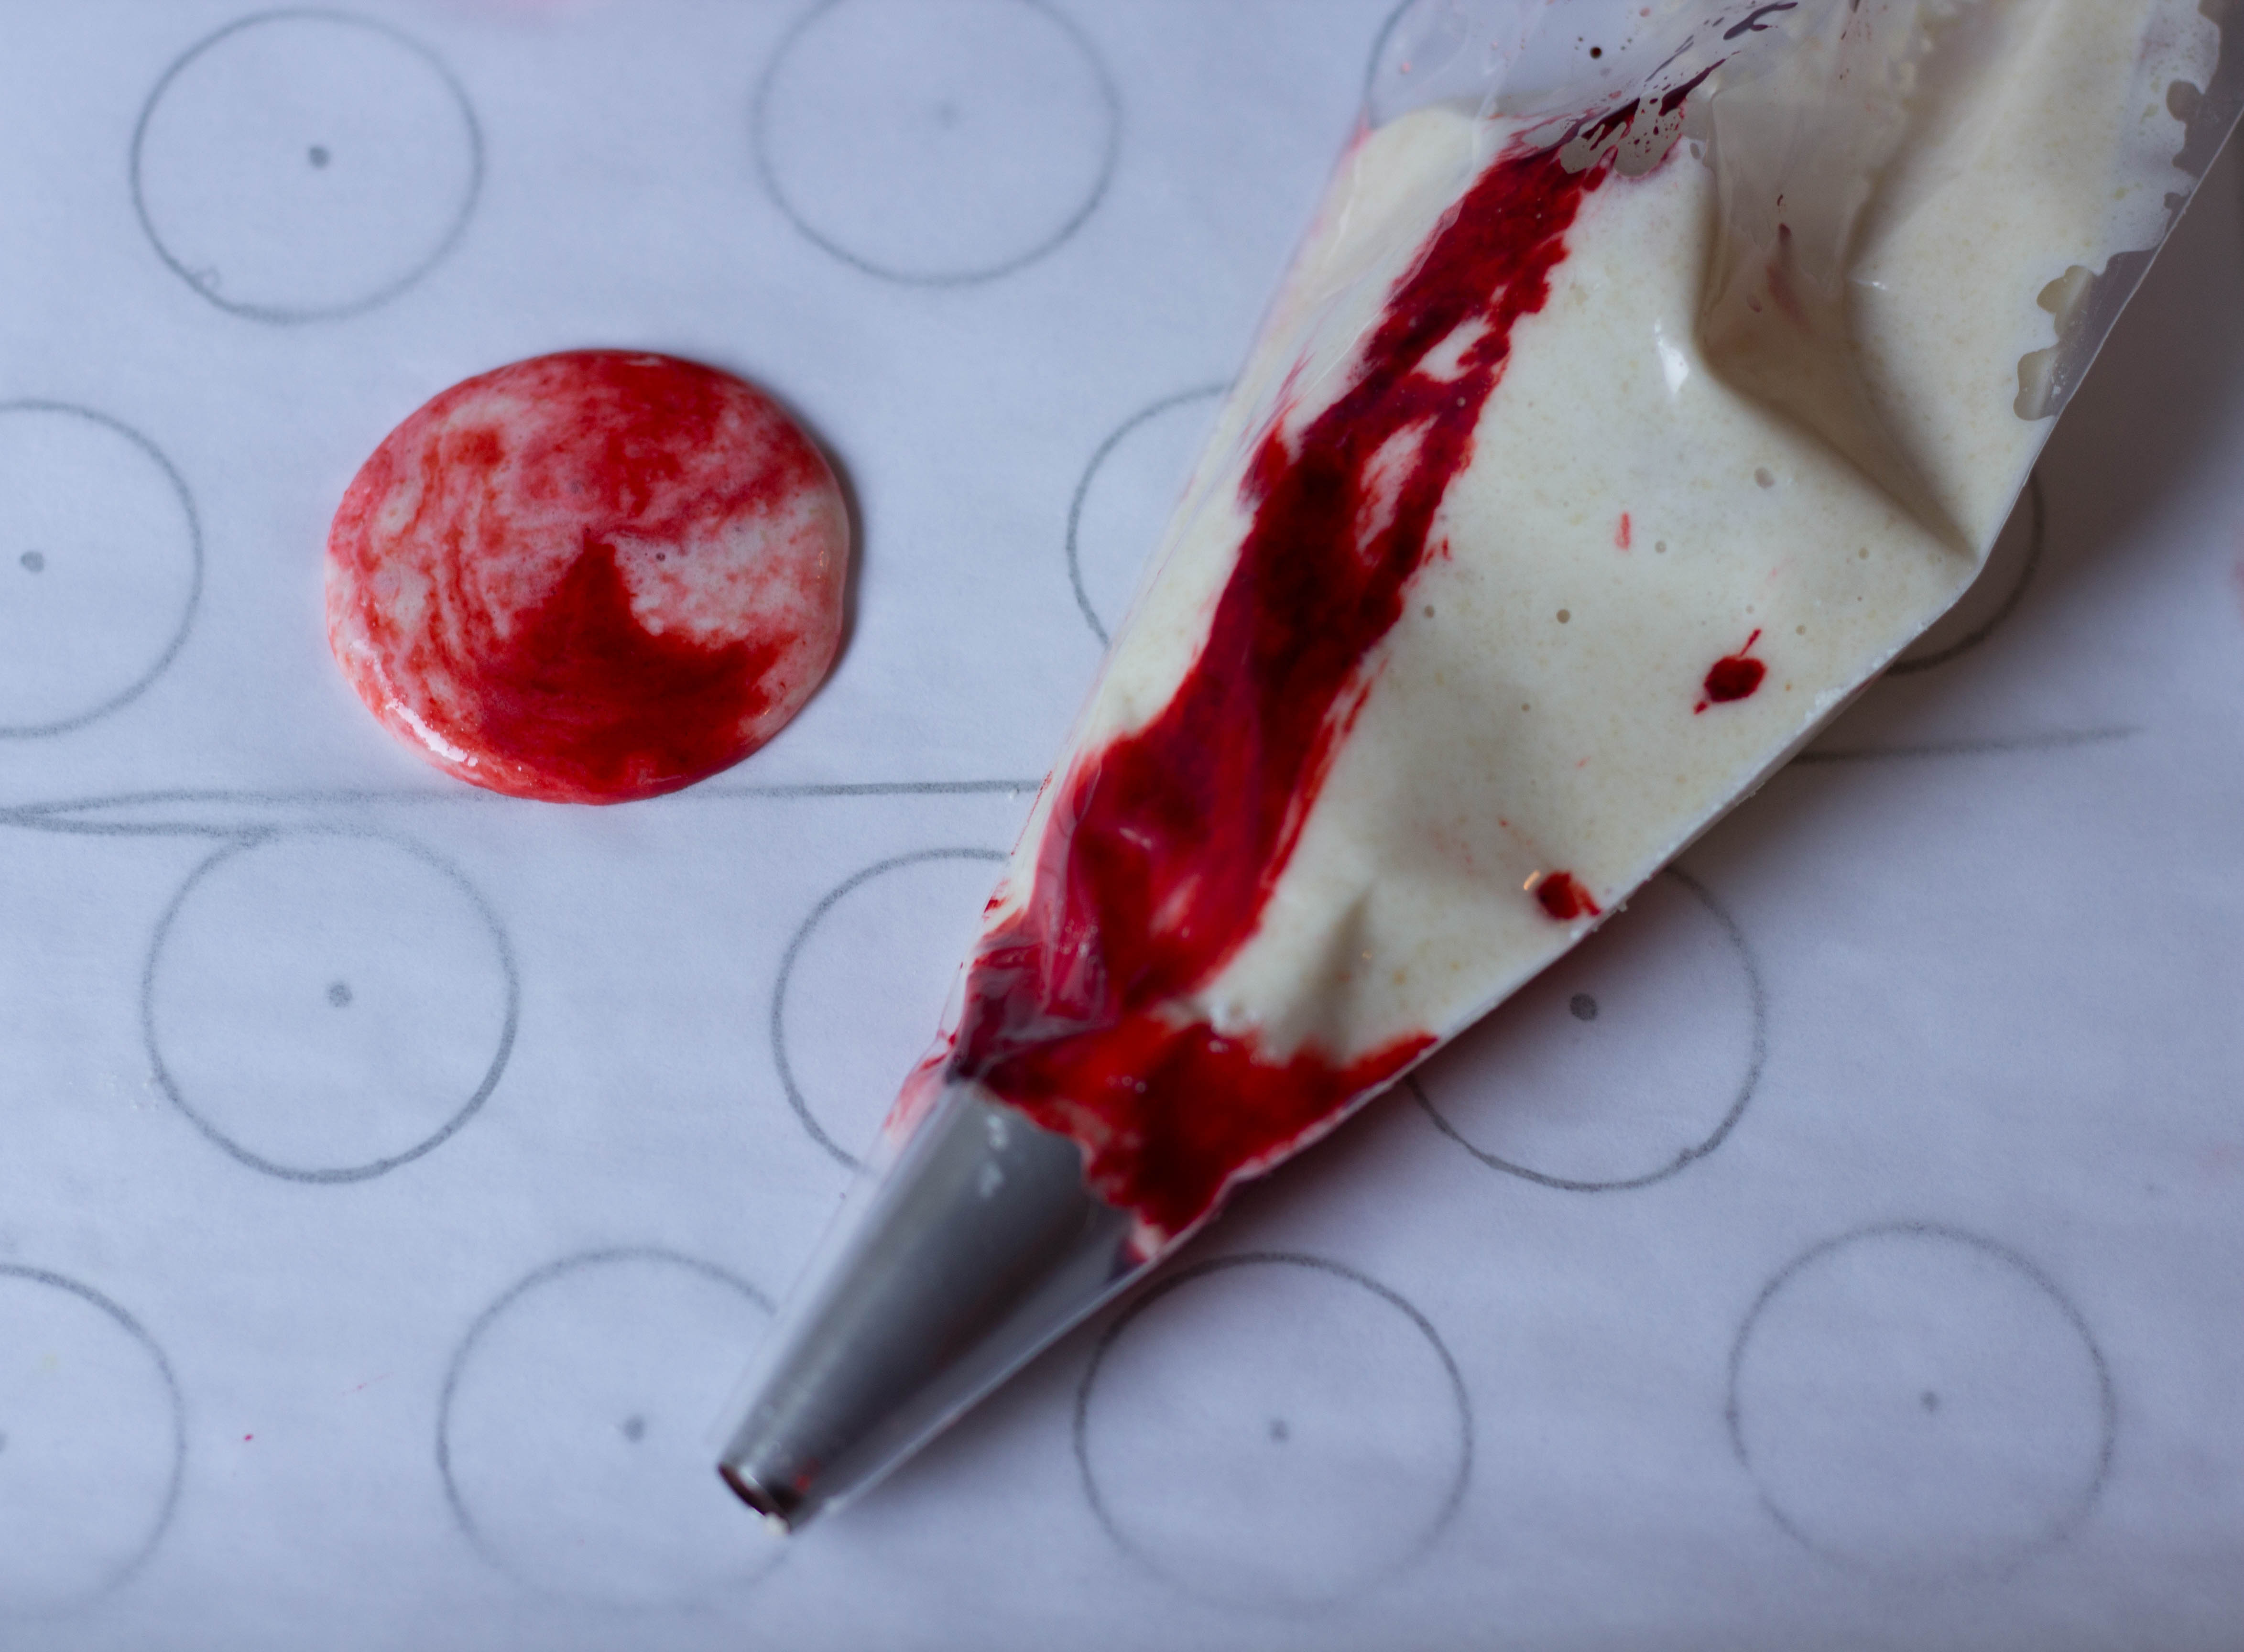
Fill bag with macaron batter
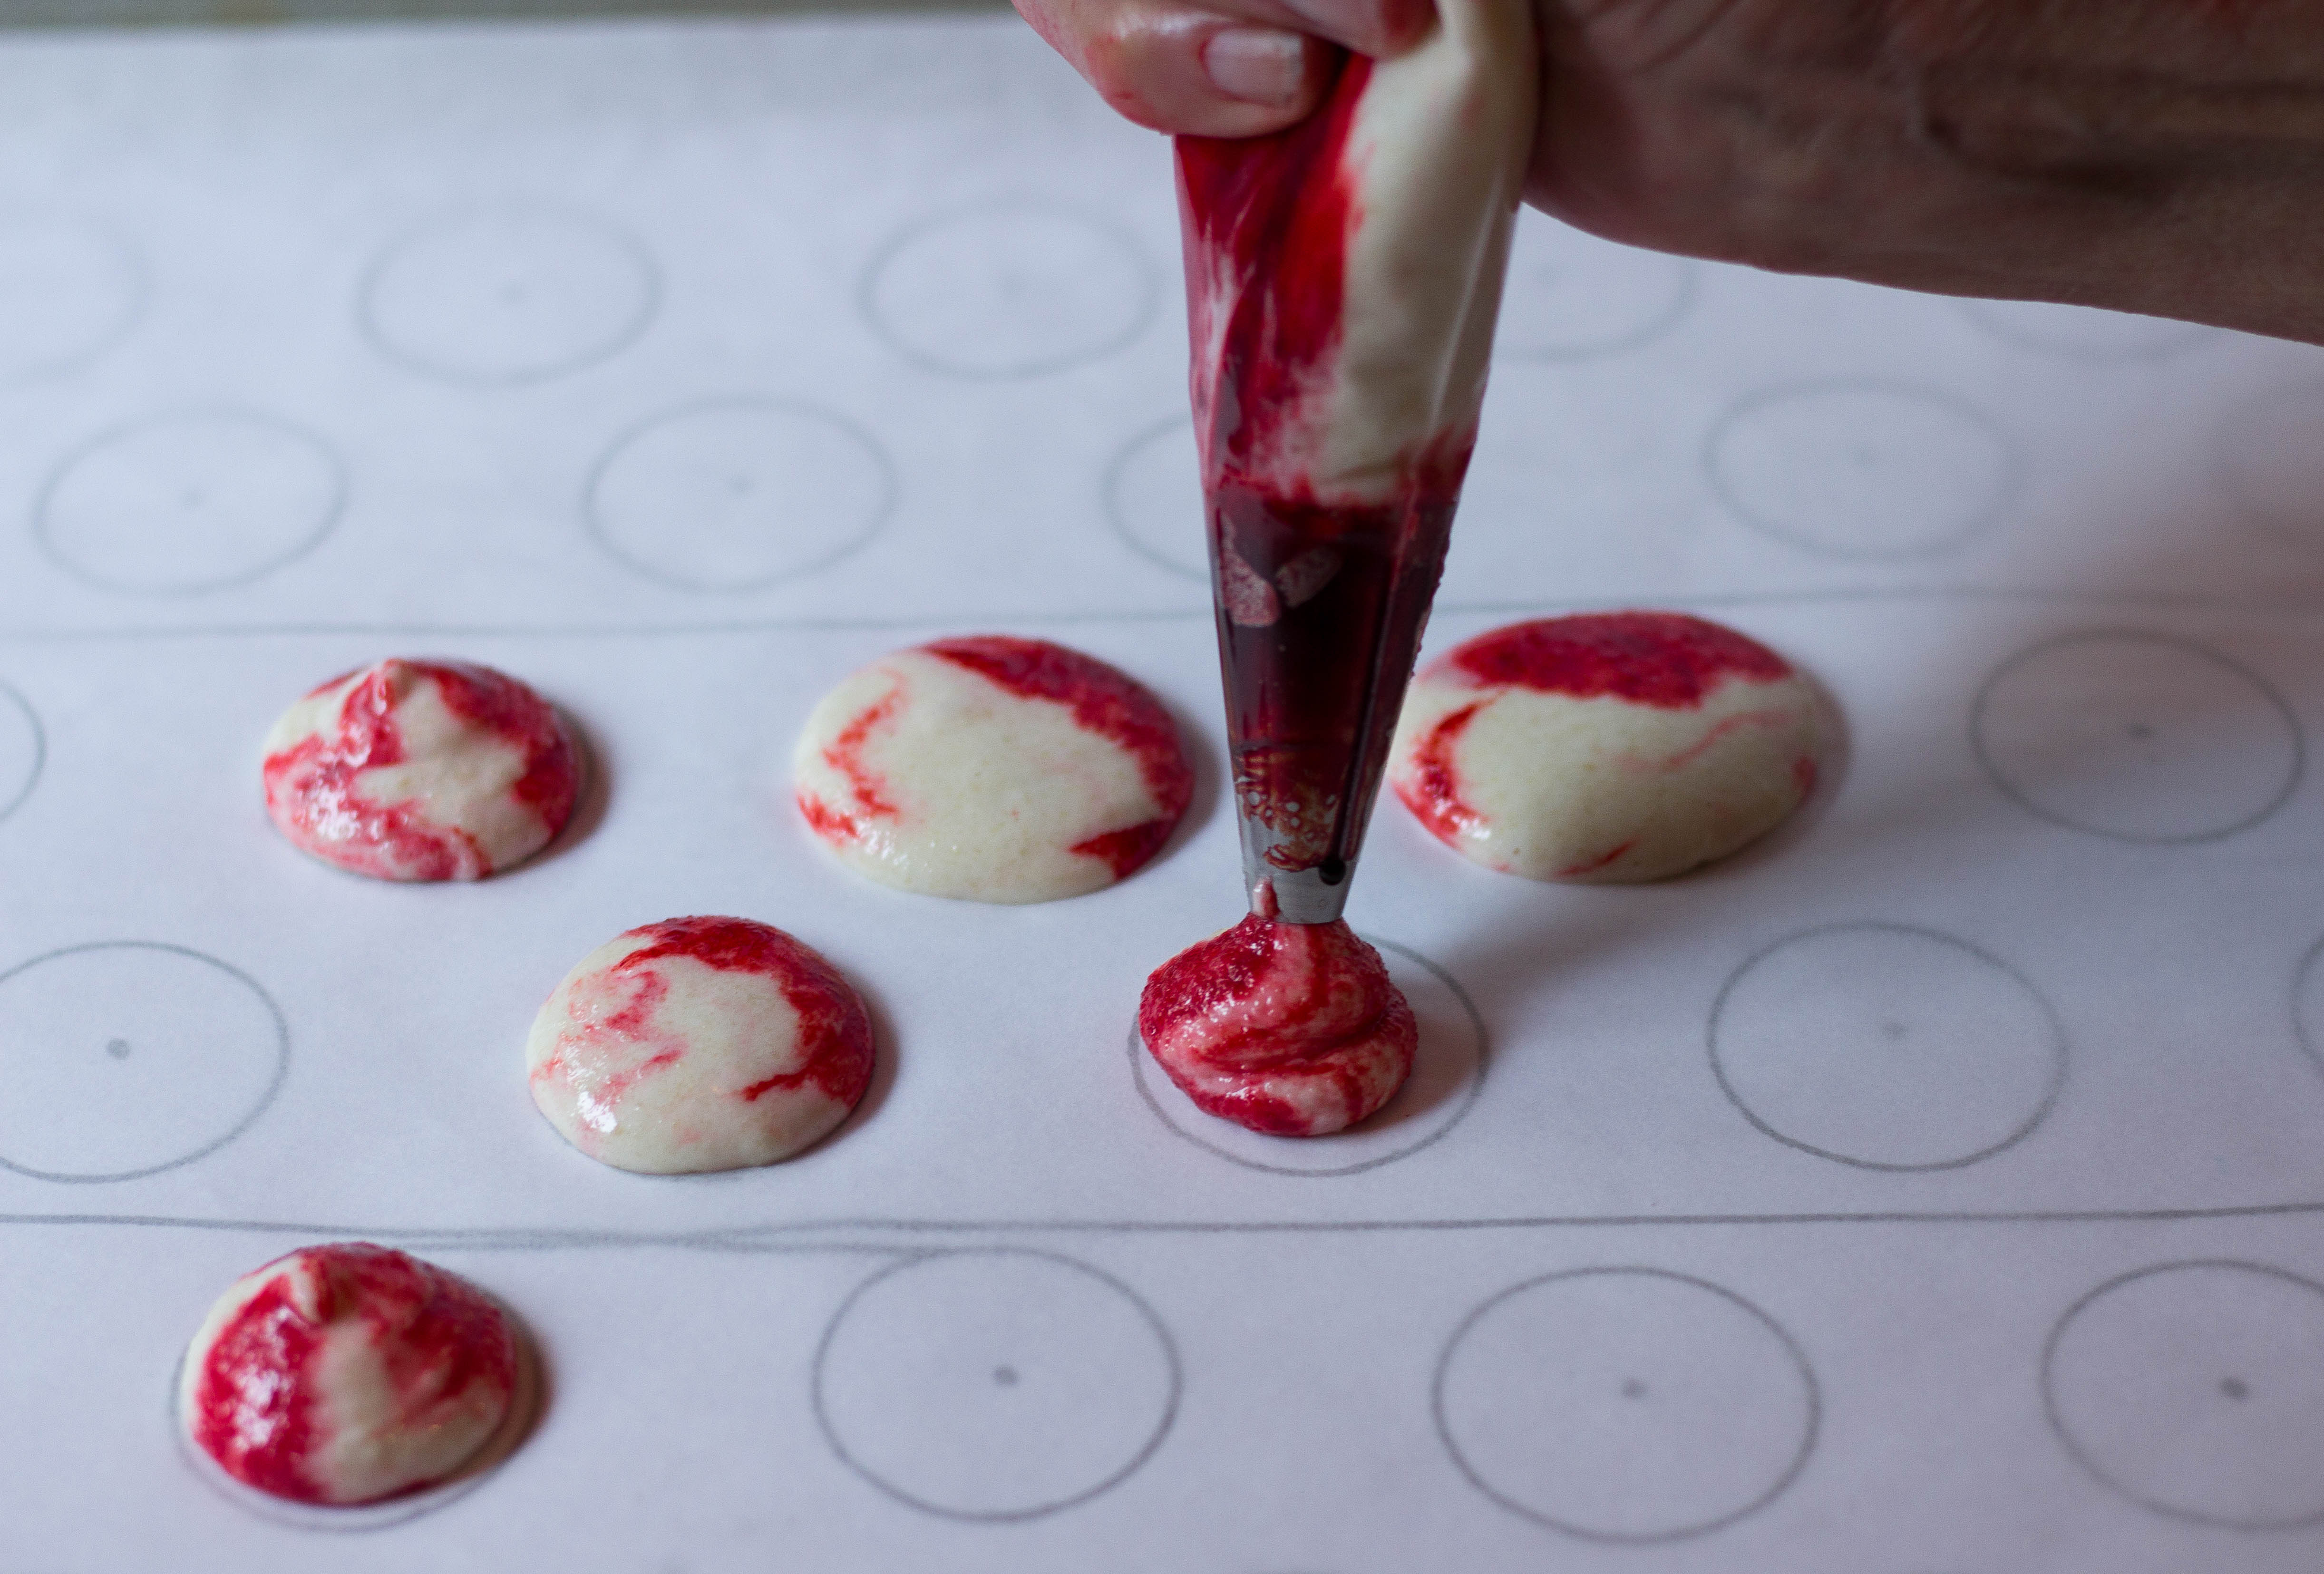
Ready to Pipe the Macarons
Pipe the batter onto the prepared parchment paper with the piping bag and nozzle pointing straight down towards the baking tray. Place the tip 1/2 inch above the tray and squeeze the pastry bag- the batter should ooze outward on its own and there is no need to move your arm around. I(My macarons were 1 1/2 inches in diameter). After you have piped one macaron, stop squeezing the bag then transfer to the next circle. When finished, tap the tray 3-4 times on top of the table to release any air bubbles. Wait for 30-60 minutes until a skin begins to form on top of the macarons. When you touch the tops of the macarons, the batter should not stick to your finger.
Add a few decorations or sprinkles on top, if desired. Tip: only place a few sprinkles on top or the tops may crack!
Bake the Macarons for approximately 13 minutes at 310 F (fan-forced oven) or 330 F for conventional oven. Let cool for 10 minutes before removing the Macarons shells from the parchment paper. Turn the shells over and then ‘marry them up’ in pairs, matching sizes. Pipe the Peppermint filling on top of one shell then gently press the other shell on top. Place the cookies in an air-tight contained and cool in the fridge for 24 hours before eating. This gives enough time for the filling to absorb into the shells.
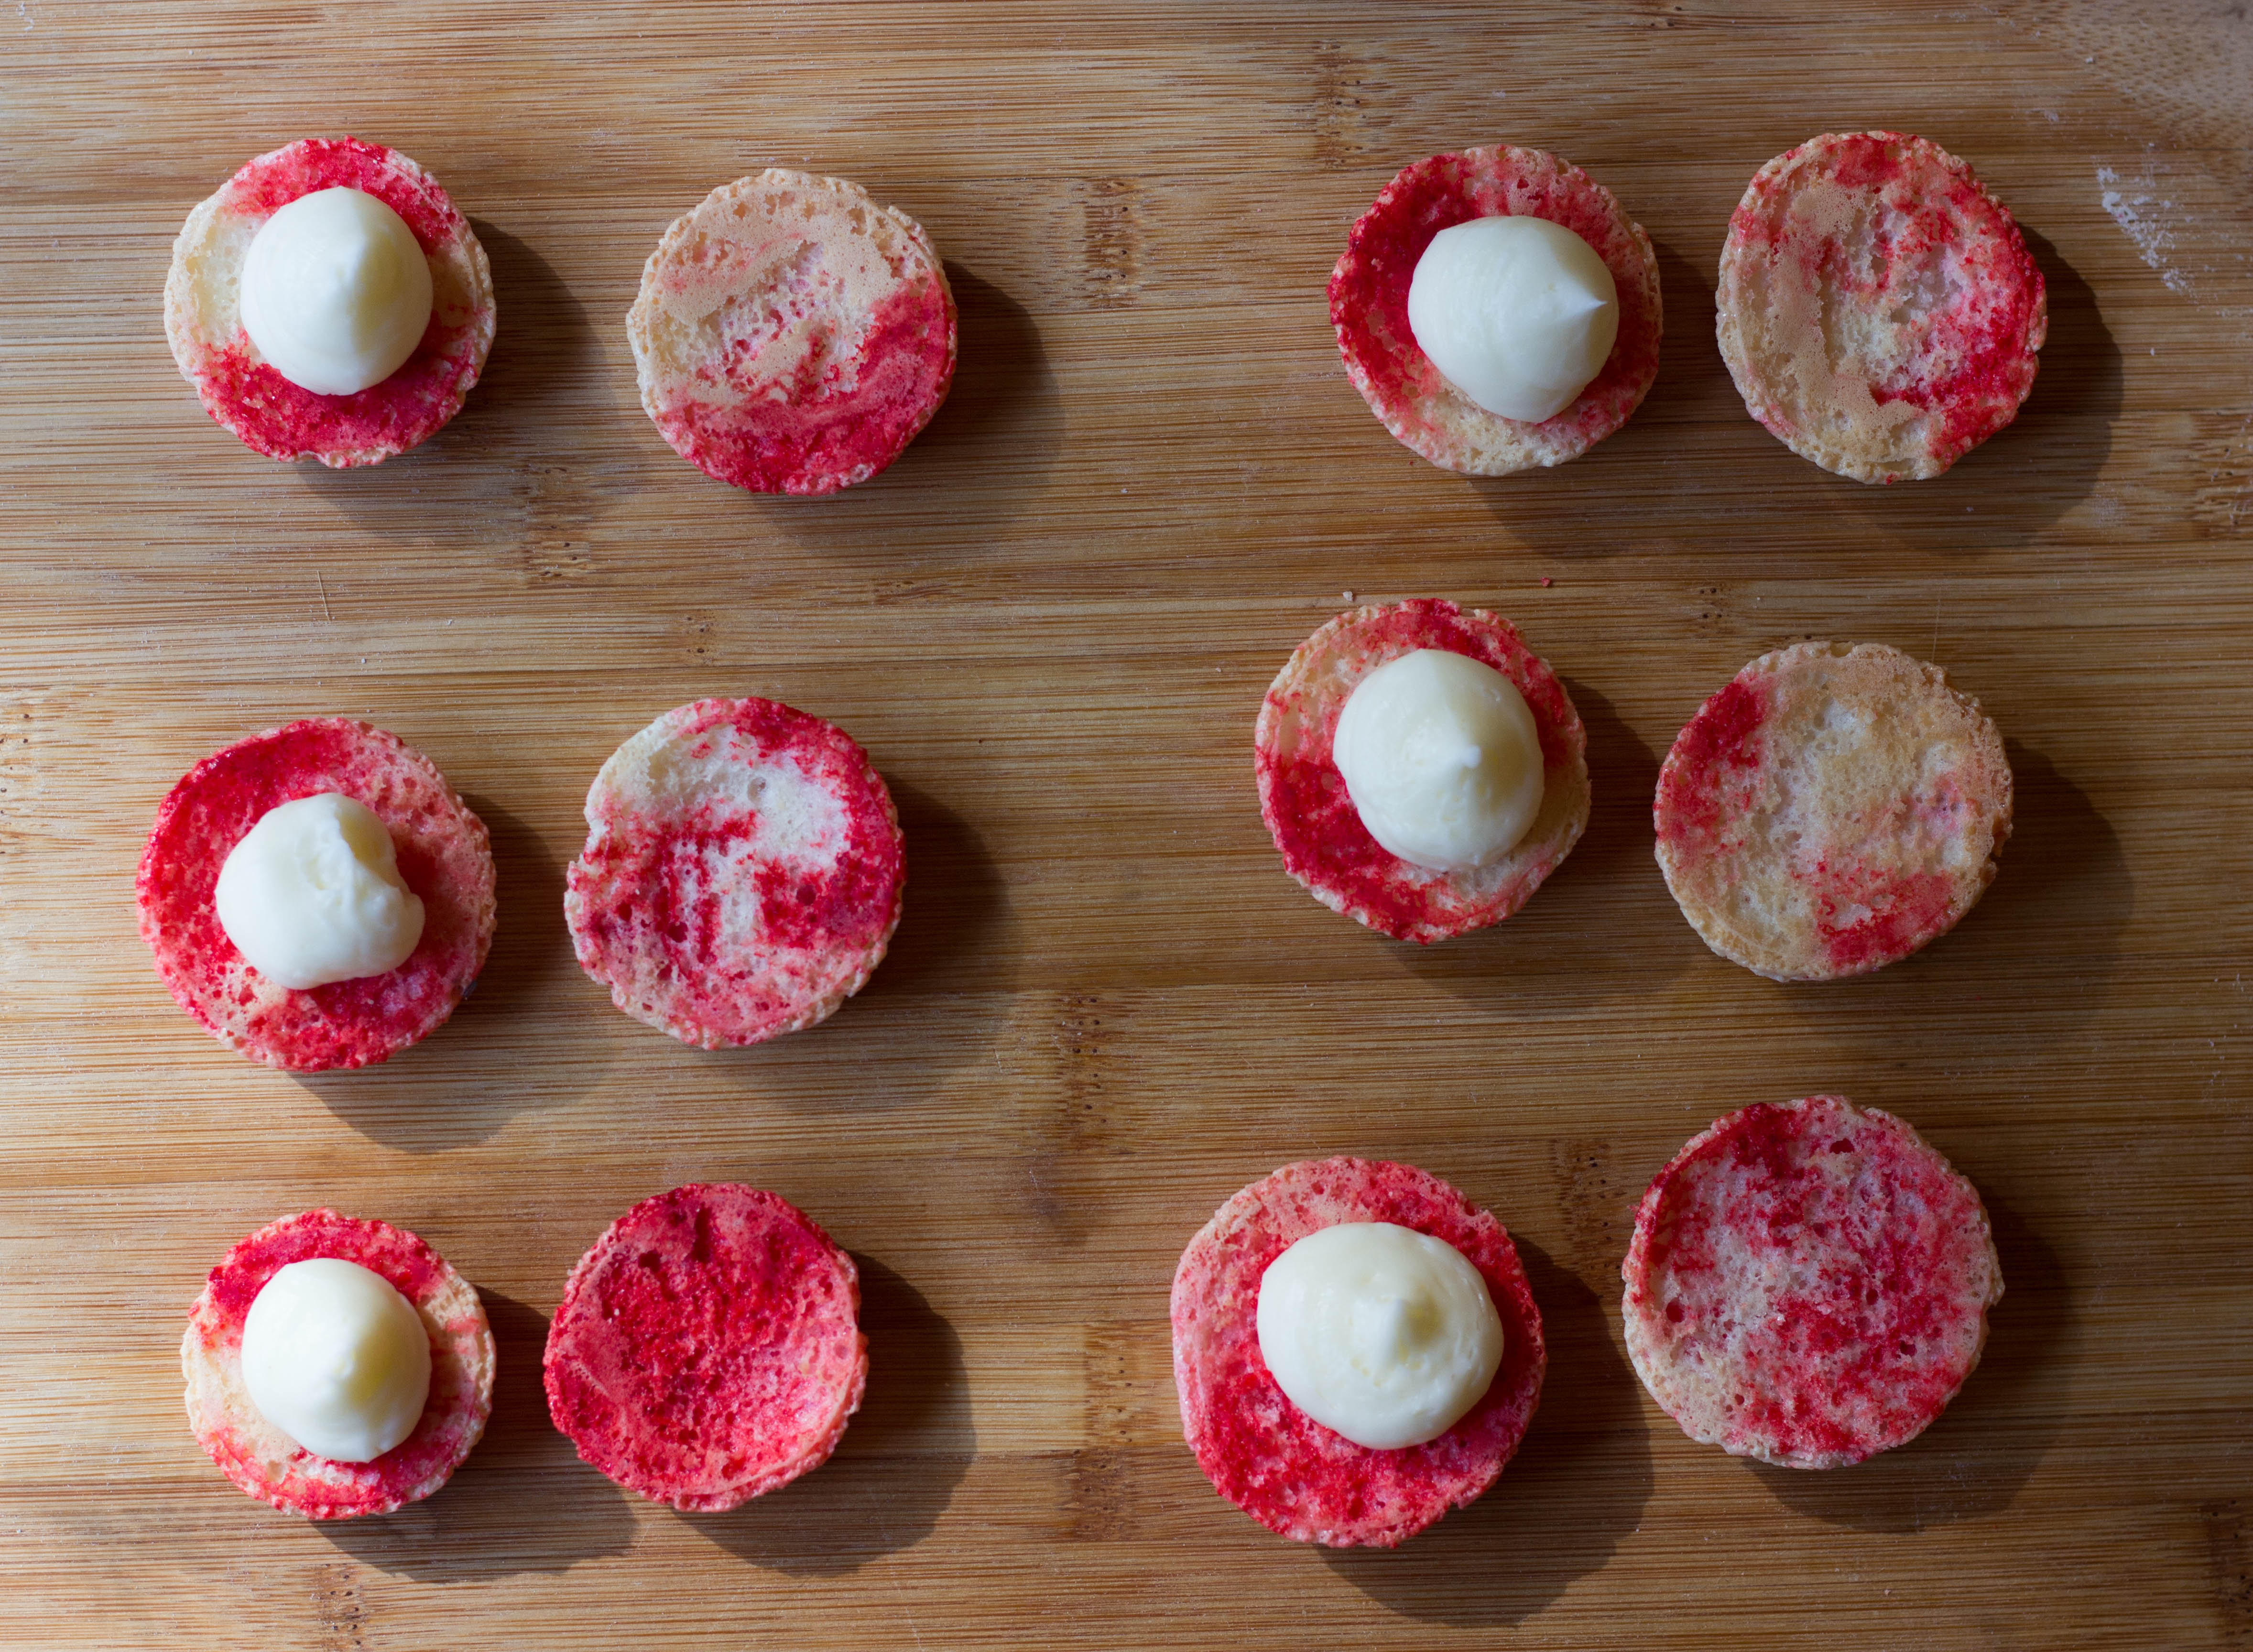
Prepare two 13 x 18 inch baking sheets with parchment paper placed over a stenciled form. Alternatively, you could use a stenciled silpat placed on the baking sheet. Place the almond flour and confectioner’s sugar in a food processor and process for about 30-40 seconds. Pass the mixture through a sieve and transfer to a mixing bowl and set aside. The mixture should resemble talcum powder. Place the egg whites and cream of tarter in a large bowl and beat with electric beaters on high until soft peaks form, then add the granulated sugar and continue to beat until stiff peaks form and the mixture turns shiny. Add any food coloring gel at this point. (You should be able to hold the bowl upside down and the egg whites will still cling to the bowl). The Macronage: Using a rubber spatula, add the dry mixture into the egg whites in three separate additions, gently folding thoroughly after each addition. For the folding technique, scrape the spatula along the side of the bowl using an outward motion, then fold the spatula over. Be sure to cut into the middle of the mixture occasionally with the spatula. Continue until the ingredients are fully combined with the mixture still looking a bit grainy. Using a dough scraper continue mixing the macaron batter, pressing the flat edge of the scraper against the sides of the mixing bowl to release any air bubbles and to further incorporate the egg whites into the batter. Continue mixing until ‘ribbons’ begin to fall off the edge of the scraper (you should be able to draw a figure 8 in the batter). The batter should appear smooth and satiny. (Caution: do not over-mix the batter; you should only need between 7-8 motions for this step). Place the piping bag into a container and fold the upper edges over the top, fitting like a collar. Place a few drops of red food dye (or other color) into a bowl and dip a small brush into the dye. Starting from the bottom of the pastry bag, draw a thin line going from the nozzle to the top. The line should be thin and should not be solid. Draw a second thin line opposite the first, then fill the bag with the macaron batter. You should now see the streaks of dye inside the piping bag. Pipe the batter onto the prepared parchment paper with the piping bag and nozzle pointing straight down towards the baking tray. Place the tip 1/2 inch above the tray and squeeze the pastry bag- the batter should ooze outward on its own and there is no need to move your arm around. After you have piped one macaron, stop squeezing the bag then transfer to the next circle. When finished, tap the tray 3-4 times on top of the table to release any air bubbles. Wait for 30-60 minutes until a skin begins to form on top of the macarons. When you touch the tops of the macarons, the batter should not stick to your finger. Bake the Macarons for approximately 13 minutes at 310 F (fan-forced oven) or 330 F for conventional oven. Let cool for 10 minutes before removing the Macarons shells from the parchment paper. Turn the shells over and then 'marry them up' in pairs, matching sizes. Pipe the Peppermint filling on top of one shell then gently press the other shell on top. Place the cookies in an air-tight contained and cool in the fridge for 24 hours before eating. This gives enough time for the filling to absorb into the shells. For the Peppermint Buttercream filling: Place the softened butter in a bowl and cream with electric beaters until smooth and almost double in size. Gradually add the confectioner's sugar while beating, then add the peppermint extract and cream. Continue beating until the mixture is smooth and creamy; add a little more cream or milk if the mixture is too dry.Christmas Peppermint Macarons
Print Recipe
Ingredients
Instructions
5 Comments
kitchenriffs
December 2, 2021 at 3:35 pmThese look so festive! And peppermint is quite welcome at this time of the year (anytime, really!), so I’d happily snarf down 2 or 3 of these. Or 4, or … 🙂 The dye trick is great — wonderful tip. Anyway, nice recipe — thanks.
angiesrecipes
December 2, 2021 at 7:26 pmSo christmasy and beautiful. I have never had or baked peppermint macarons…definitely on my list to try!
David Scott Allen
December 6, 2021 at 9:20 amThese look so beautiful and I love peppermint, especially at Christmas!
Raymund
December 7, 2021 at 5:52 pmWow those macarons are perfect! great flavours too. My daughter is now an expert in making macarons and I would defintiely show this to her.
Jeff the Chef
December 29, 2021 at 9:55 amPerfect for Christmas. I’ve never made macarons at home, but it does sound like a perfect Christmastime project.