
This post was inspired by Uri Scheft’s ‘Famous Chocolate Babka’ recipe, which he illustrates in his new Breaking Breads cookbook. This Danish-Israeli baker perfected his baking skills in Israel and later transported himself to New York City, where he now operates his Breads Bakery in Union Square. Why does he call his Babka ‘famous’? For no other reason than being named “the best Babka in New York City” for 2013 by New York Magazine!
With such an illustrious award behind his name, I felt compelled to find out why his Babka was named the best in New York City. After all, there must be hundreds of bakeries in New York, with many churning out Babkas (even the Seinfeld show featured one episode of Jerry Seinfeld lusting after a Babka)!
It turns out that Uri uses laminated dough in his Babka recipe, a butter-encasing technique normally used for puff pastry and croissants, which makes for light, flaky layers. For this process, butter is folded into the dough multiple times to create very thin alternating layers of butter and dough. The more the dough is folded and ‘turned’, the more layers of delicate flaky pastry are produced. This process, plus the fact that the dough is filled with a ‘scandalous mix’ of rich Nutella and dark chocolate chips, makes these Babkas a delicacy made in heaven.
I practiced making this recipe three times in order to get the hang of making the laminated dough. I wound up using slightly less flour than Uri’s recipe and found that my recipe yielded two loaves each time, instead of Uri’s three loaves.
Was it worth the extra effort of making the laminated dough? You bet! And I’m not the only one who thought so- just ask New York Magazine!
Since this is a rather long post, I will now wish you all a Happy New Year and thank you so much for stopping by my blog!
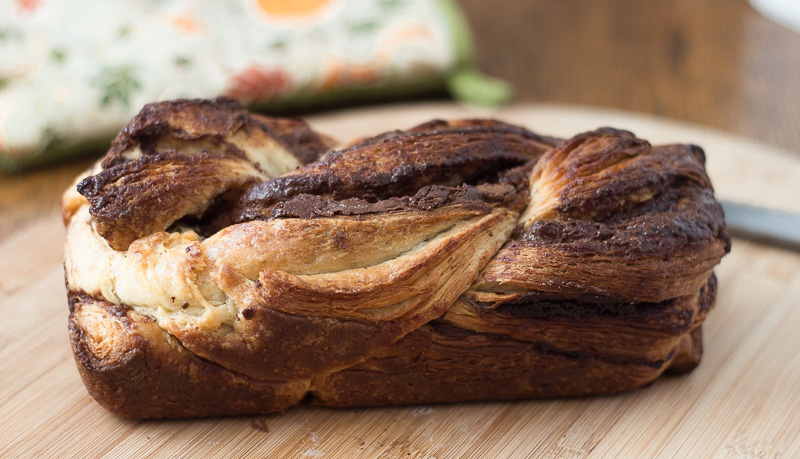
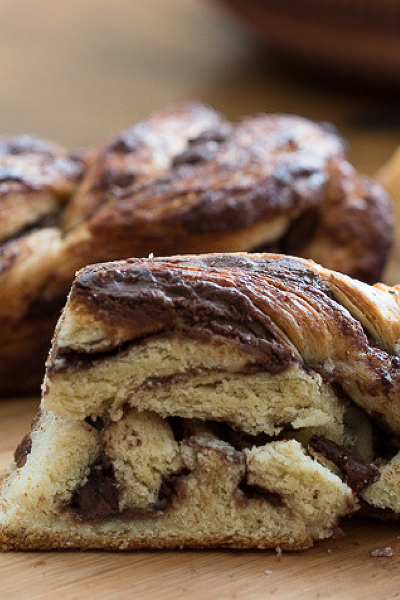
The full printable recipe is located at the end of this post. Here is the illustrated process for laminating, filling and shaping the dough into the Famous Chocolate Babka.
(Note: you will need two bread loaf pans for this recipe: I feel that 8 x 4 inch pans work best but you could also use 9 x 5 inch pans).
Laminating the Dough
After kneading the dough, let it rest for 30 minutes, then press it into a 1- inch thick rectangle, cover in plastic wrap and chill in the fridge for at least one hour. Prepare the 200 grams of butter by placing it on a piece of parchment paper and using a rolling pin to ‘pound’ and mold it into a rectangular shape measuring 7 x 8 inches. Set aside.
On a lightly-floured surface, roll the dough out into a 7 x 16 inch rectangle with the shorter side facing you. Place the butter on the lower half of the rectangle and use a knife or spatula to smooth it onto the dough, then fold the top half of the dough over the bottom half. (The butter should be cool but pliable so it can be molded and spread across the dough).
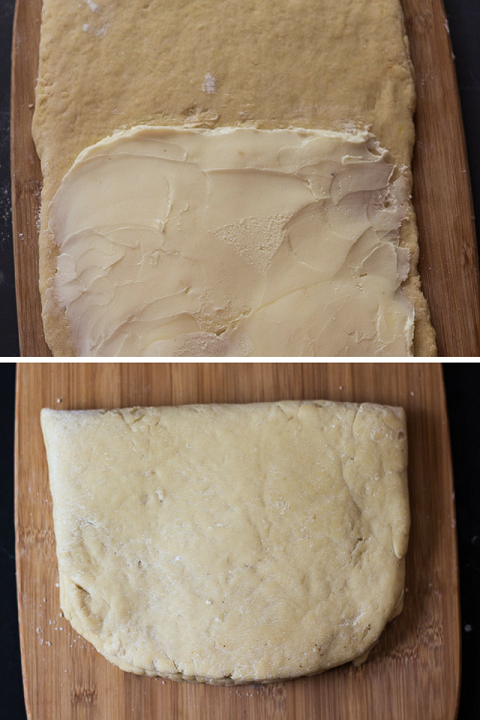
Rotate the dough a quarter turn so that the edges that were on the bottom are now facing the right side of the dough. Roll the dough out into a rectangle measuring 9 x 16 inches.
Rotate dough 1/4 turn, then roll out into 9 x 16 inch rectangle
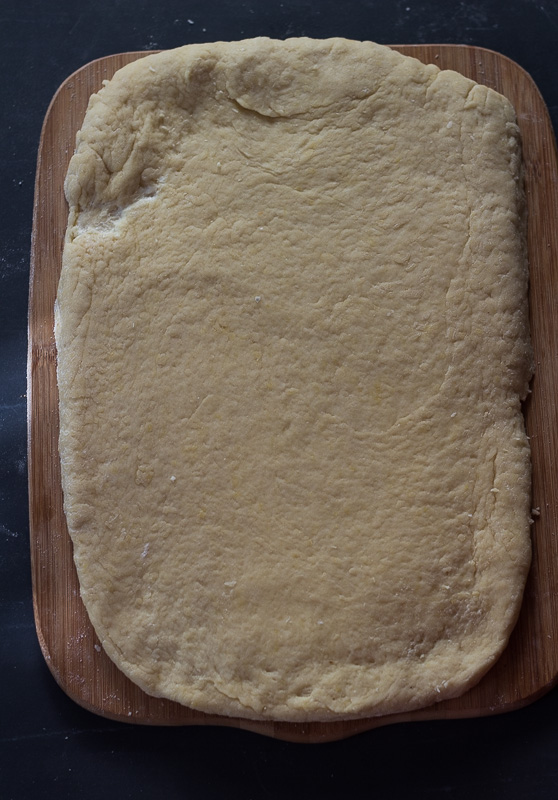
Fold the dough into thirds like a ‘business letter‘: first fold the bottom part upwards then fold the top part down so that the edges are even at the bottom- this is called a simple fold.
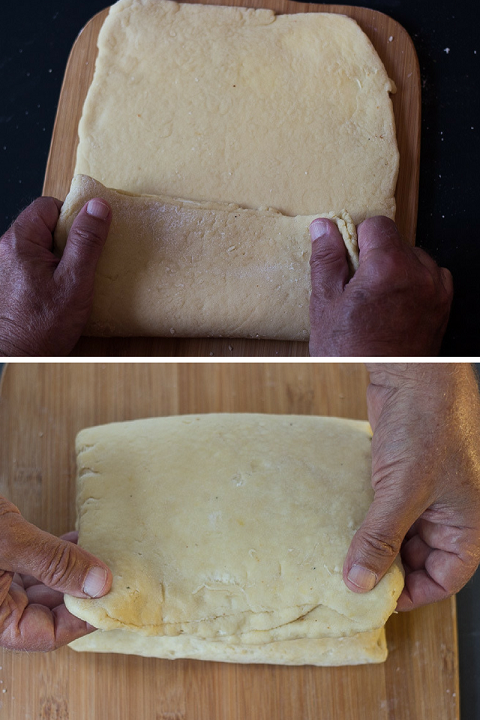
Now rotate the dough a quarter turn again so that the bottom edges are now facing the right side of the dough. After the turn, you should be able to open the dough up ‘like a book.’ Mark this second turn of the dough by making two indentations with your thumb. This will help you to remember the number of turns you have completed.
Marking the dough with your thumb to keep track of the number of ‘turns’ you have made
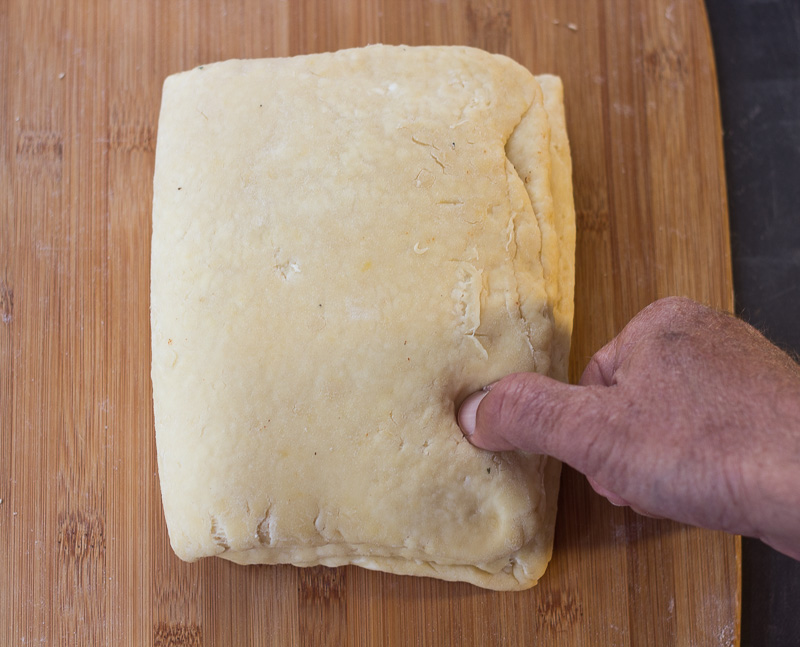
Wrap the dough in plastic wrap and chill in the fridge for at least 20 minutes (this helps to firm up the dough and prevent the butter from melting into the dough).
Remove the dough from the fridge and repeat the simple fold process two more times; first rolling the dough out, folding it, turning it, then refrigerating the dough each time. Wrap the dough in plastic and refrigerate for at least 5 hours or overnight.
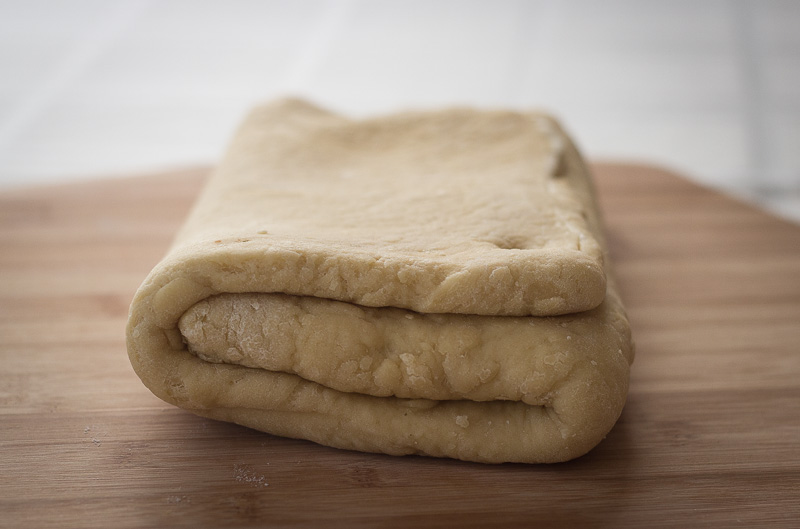
View of the folded dough from the side
After the dough has been chilled, remove from the fridge and roll out into a rectangle measuring 18 inches by 10 inches, with the long side facing you. The dough should be just shy of 1/4 inch thick. Spread a layer of Nutella over the dough, then sprinkle the semi sweet chocolate chips evenly.
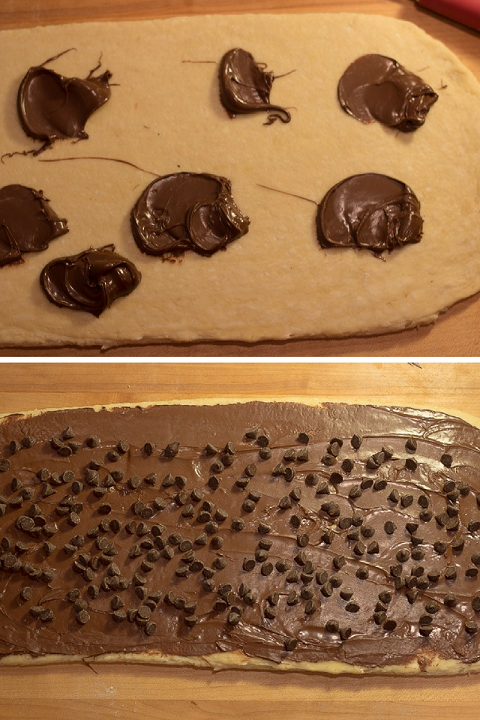
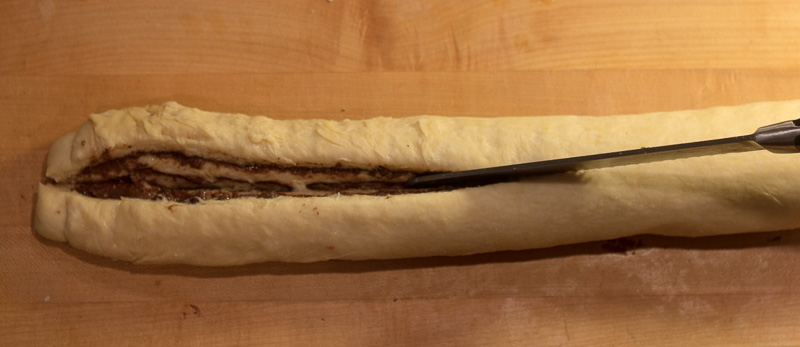
Starting from the bottom of the dough, roll it up into a tight cylinder with the seam facing downwards. When finished rolling, stretch the cylinder out a little with your hands. Slice the dough in half lengthwise and then open up the dough so that the Nutella/chocolate side faces upward.
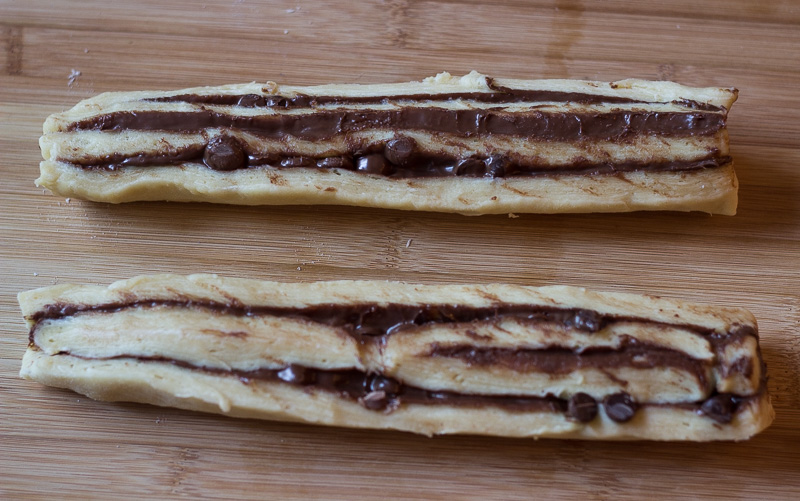
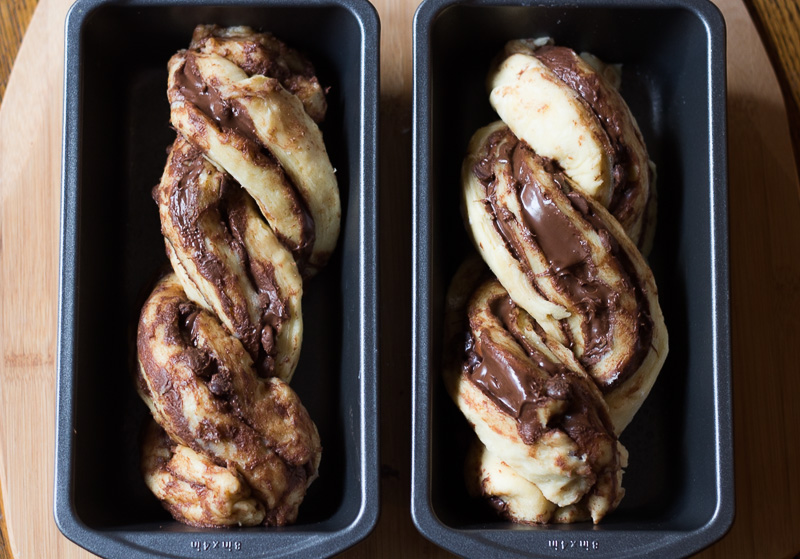
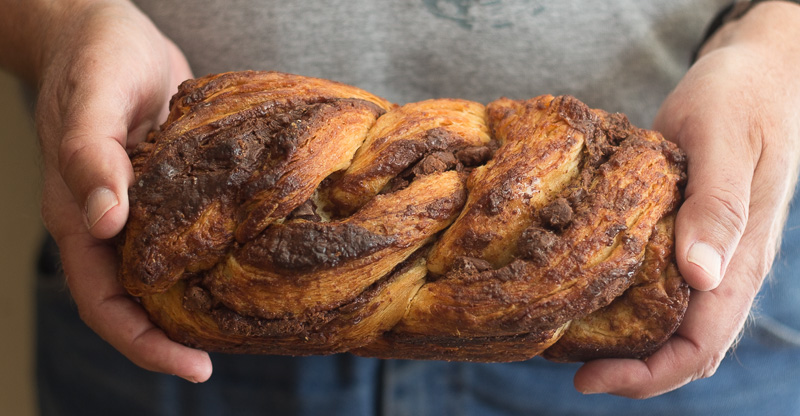
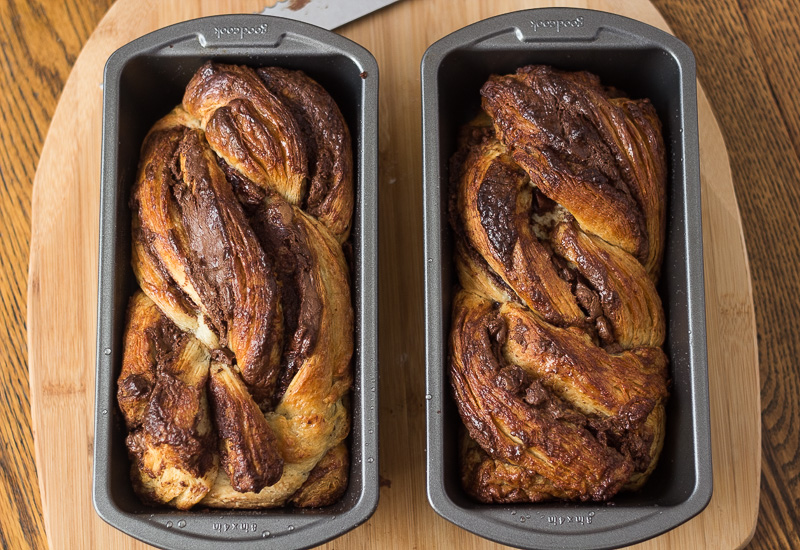
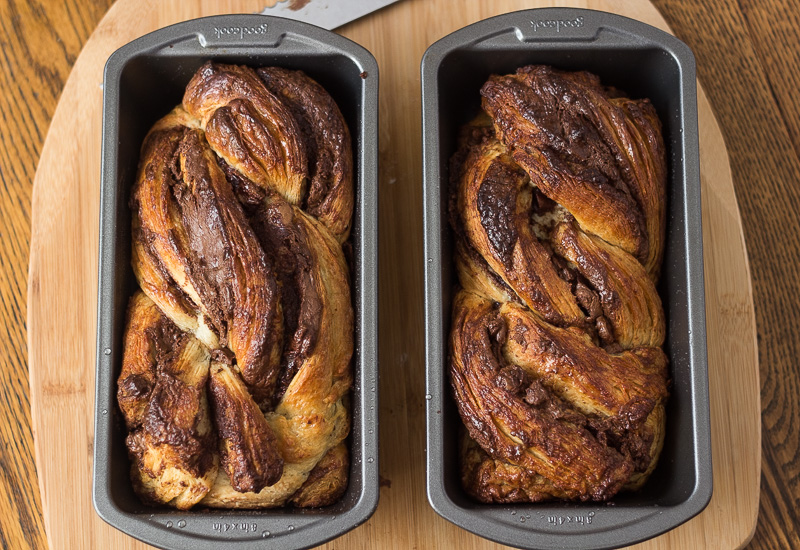
Cut the lengths of dough horizontally in half, so you now have four equal strips of dough. Form two pieces of dough into a Twist shape: join the two pieces together at the top, then overlap them in an alternating sequence. Place the dough in the loaf pans and let rise until the dough reaches the top of the pan (1 – 2 hours). Bake for around 40 minutes or until the loaves turn golden brown. Remove from oven and baste with the sugar syrup. The bread is best when served warm.

- ½ cup warm milk
- 1 packet dry yeast (6 grams)
- 6 tbsps. softened butter
- 1/3 cup granulated sugar
- 2 large eggs
- 1/s tsp vanilla extract
- Pinch salt
- 2 ½ cups all-purpose flour
- 1 ½ cups pastry or cake flour
- 200 g butter (1 stick plus 5 tablespoons) at cool room temperature
- 1 ½ cups Nutella
- 1 cup semisweet chocolate chips
- ¾ cup sugar
- ½ cup water
- Add the dry yeast to the warmed milk and let set for a few minutes until dissolved. In a separate bowl, mix together the softened butter and sugar until smooth, then add the eggs, vanilla extract, salt and yeast mixture. Beat with electric beaters until combined. With the electric beaters still running, gradually add the first 2 1/2 cups of flour until the mixture is smooth. After this, it will be more difficult to use the electric beaters, so gradually add the remaining 1 ½ cups of cake flour using a large wooden spoon or by working the flour in with your hands.
- Alternatively, you can mix the flour into the dough using a stand mixer with a dough hook, mixing for about 4 minutes until the dough is smooth and has good elasticity.
- Knead the dough: turn the dough out onto a lightly-floured surface and form into a rough ball. Take the top part of the dough and stretch and tear it away from you along the work surface, using the heel of your hand. Re-gather the dough into a ball shape, rotate a quarter turn and repeat for about 3 minutes. Set the ball into a floured-bowl, cover with plastic wrap and set aside for 30 minutes at room temperature.
- Chill the dough. Place the dough on a piece of plastic wrap and press it into a rectangular shape about 1 inch thick. Cover with the plastic and refrigerate for at least 1 hour (or longer, if possible).
- Note: to simplify this recipe, you can skip the step of laminating the dough (below) and proceed to the step of preparing the chocolate filling and forming the dough into a twist shape.
- Prepare the butter. Place the 200 g butter on a piece of parchment paper and beat and mold it into a 7 x 8 inch rectangle using a rolling pin; set aside. Remove the dough from the fridge and on a lightly-floured surface, roll it out into a rectangle measuring 7 x 16 inches, with the short side facing you. Place the butter on the bottom half of the rolled-out dough and use a knife or spatula to spread the butter, leaving a margin of ¼ inch at the bottom. Fold the top half of the dough over the bottom half, pulling the corners so they align perfectly. Turn the dough ¼ turn so that the edges (seams) that were facing the bottom are now facing the right side.
- Roll out the dough into a rectangle measuring 9 x 16 inches. Fold the dough into thirds like a 'business letter'- fold the bottom of the dough upwards then fold the top over the bottom so that the edges align perfectly.This is called a ‘Simple Fold.' Turn the dough ¼ turn again so that the edges that were facing the bottom are now facing the right side. Mark this second turn of the dough by making two indentations on the dough with your thumb.This will help you to keep track of the amount of turns you have made. Wrap the dough in plastic and chill for 20 minutes. Remove the dough from the fridge and repeat the simple fold process two more times: rolling, folding, turning and refrigerating the dough each time. Wrap the dough in plastic and chill for at least 5 hours or overnight.
- After chilling the dough, roll the dough out into a rectangle about 18 x 10 inches, with the long side facing you. The dough should be slightly less than ¼ inch thick. Spread the Nutella over the dough all the way to the edges, then sprinkle the chocolate chip pieces evenly over the dough. Starting from the bottom edge, roll the dough into a tight cylinder with the seam ending face down. Hold the ends of the dough with both hands and stretch the dough out even a little longer.
- Slice the dough in half lengthwise using a serrated bread knife, then slice each part in half cross-wise, leaving you with four pieces of dough about 9 inches long each. To form the twist shapes, join the top ends of two pieces of dough, then alternatively overlap the pieces over each other, forming the twist shape. Place the two Babka twists into the loaf pans, tucking the ends under a little if necessary to make them fit into the pans. Let the loaves rise until the tops rise to the top of the pan (1 – 2 hours). Bake in a pre-heated oven at 350 F about 40 minutes, or until the loaves turn a dark brown. If the loves brown too quickly , ‘tent’ them in foil for the remaining cooking time to prevent over-browning them.
- While the loaves are baking, prepare the Simple Syrup. Combine the sugar and water in a small saucepan. Over medium heat, stir until the mixture boils; reduce the heat and stir for several minutes until the mixture thickens; let cool.
- Remove the bread from the oven and brush with the simple syrup while still warm. Use a paring knife to separate the Babkas from the pan edges and turn them out from the pan. Slice and serve either warm or at room temperature.
- Uri Scheft uses loaf pans measuring 9 x 2 3/4 x 2 inches to make Babkas for his bakery. These are pans that normally need to be specially ordered. Instead, I used pans measuring 8 x 4 inches, which worked well.

11 Comments
Karen (Back Road Journal)
January 1, 2017 at 7:44 amDelicious with a cup of tea…it would be a nice way to start the new year. Happy New Year.
Maureen
January 1, 2017 at 10:44 amFran, that’s downright gorgeous! I’d love to sit down with a piece of that and a cuppa, put my feet up and start the year right.
Happy New Year!
SeattleDee
January 1, 2017 at 4:51 pmI am totally in awe of your patience, skill and gorgeous results! Your chocolate Nutella babka look amazing, and temptingly delicious. Happy New Year!
John/Kitchen Riffs
January 4, 2017 at 12:27 pmWow! Truly gorgeous. Takes a bit of time to make, but totally worth the effort. Happy New Year!
Lynn @ Oh-So Yummy
January 4, 2017 at 7:48 pmThis sounds really neat but our bread dough is always so sticky! I think we haven’t figured out the proper method yet. Also, when you repeat the simple fold, do you reroll it again or is the dough just getting smaller for the second and third iteration?
Fran
January 5, 2017 at 2:40 amLynn, thanks for your comment. Yes, when repeating the simple fold, you do reroll the dough again, then fold it, turn it a quarter turn and refirgerate it for 20 minutes. Also, be sure to roll out your dough on a lightly-floured surface and also dust your rolling pin with some flour- this helps to reduce the ‘stickiness’ of your dough. I also sometimes dust the top of my dough if it becomes too sticky.
Kathy @ Beyond the Chicken Coop
January 5, 2017 at 2:34 amWhat a beautiful loaf! I have not ever made a laminated loaf before, but the results are stunningly beautiful! I can only imagine the taste!
All That I'm Eating
January 12, 2017 at 12:02 amOH MY! This looks amazing, it’s a good job the recipe makes two…one wouldn’t be enough!
Juliana
January 18, 2017 at 8:15 amYour babka turned out so pretty, I love all the layers in the loaves…I just need a cup of tea to go with it…
Have a wonderful week ahead Fran 🙂
marie johson
February 27, 2020 at 10:21 pmNever tried this babka before but sounds so delicious. Gonna give it a try soon for sure 🙂
marie johson
April 6, 2020 at 10:14 pmAmazing recipe as always 🙂